[原创]webservice 笔记(小结) axis2 集成spring <二> 调用服务
刚才我们已经把我们的服务发布成功了,现在我们开始访问我们的服务,我们采用
根据wsdl自动生成客户端的方式
一、
1、新建一个java project ,取名为ServiceClient
2、建立一个User Library 取名AXIS2 将axis2 所需要的jar文件加到AXIS2中,然后在
ServiceClient 中引入这个library
3、在eclipse中安装axis2插件
Service Archive Wizard - Eclipse Plug-in 和 Code Generator Wizard - Eclipse Plug-in
注:安装方式可见我的博客中的axis webservice 笔记 安装eclipse axis2 插件 (links 方式)文章
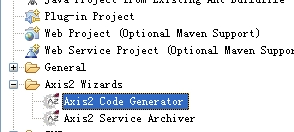
4、(1)选择new->other->Axis2 Wizards-> Axis2 code generator
(2)下一步
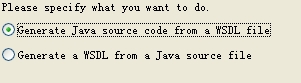
(3)下一步
把浏览其中的wsdl地址考到里面

(4) 下一步 直接点next
(5)选择生成到我们刚建好的ServiceClient的src 目录中

然后点击finish,这样就可一生成客户端了,刷新项目就可以看到了(如果在上述过程中遇到java.lang.reflect.invocationtargetexception问题可以参考我博客的eclipse axis2 reflect.invocationtargetexception文章,那是我遇到的问题)
5、生成的目录结构如图所示:
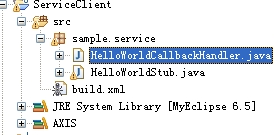
二、新建ServiceClient.java 内容如下
package sample.service;public class ServiceClient {/** * @param args */public static void main(String[] args) throws java.lang.Exception{//创建存根类HelloWorldStub stub = new HelloWorldStub();//设置相应的方法的值 HelloWorldStub.SayHello sayHello = new HelloWorldStub.SayHello();sayHello.setName("张三");//调用服务的相应方法并获得返回值HelloWorldStub.SayHelloResponse response = stub.sayHello(sayHello);System.out.println(response.get_return());}}运行这个java类,可以看到console中
打印出:hello张三 ,说明我们已经调用成功了。
这里只演示了基本数据类型的传输,待会将是复杂数据类型的传输
如果有问题可以加群 : 84242283(webservice交流学习) 1 楼 12565522 2009-11-04 用ksoap2比较合适 2 楼 12565522 2009-11-04 做客户端岂不更好