从Samples中入门IOS开发(六)------ Photo和Album浏览MyImagePicker展示了如何调用系统Photo和Album,并在自
从Samples中入门IOS开发(六)------ Photo和Album浏览
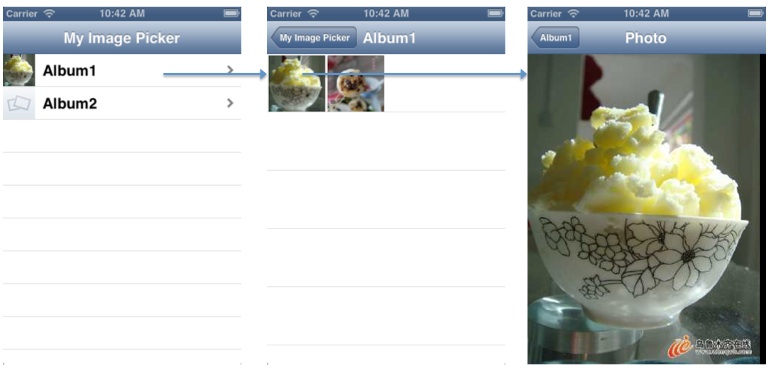
MyImagePicker展示了如何调用系统Photo和Album,并在自定义的UI中进行浏览,而这个也是很大众化的需求。
先看看这个例子的使用流程:
对于这个Sample,我主要关注两个关键点:
调用系统Photo和Album
UI组件的嵌套和组合调用系统Photo和Album
IOS提供了类ALAssetsLibrary来取得Photo下面的资源(photo, album, video等),它的主要调用方式是遍历和block回调:
- (void)viewDidLoad { self.title = @"Photo"; UIScrollView *imageScrollView = (UIScrollView *)self.view; [imageScrollView setBackgroundColor:[UIColor blackColor]]; [imageScrollView setDelegate:self]; [imageScrollView setBouncesZoom:YES]; ALAssetRepresentation *assetRepresentation = [asset defaultRepresentation]; UIImage *fullScreenImage = [UIImage imageWithCGImage:[assetRepresentation fullScreenImage] scale:[assetRepresentation scale] orientation:(UIImageOrientation)[assetRepresentation orientation]]; // add touch-sensitive image view to the scroll view TapDetectingImageView *imageView = [[TapDetectingImageView alloc] initWithImage:fullScreenImage]; [imageView setDelegate:self]; [imageView setTag:ZOOM_VIEW_TAG]; [imageScrollView setContentSize:[imageView frame].size]; [imageScrollView addSubview:imageView]; [imageView release]; // calculate minimum scale to perfectly fit image width, and begin at that scale float minimumScale = [imageScrollView frame].size.width / [imageView frame].size.width; [imageScrollView setMinimumZoomScale:minimumScale]; [imageScrollView zoomToRect:CGRectMake(0.0, 0.0, imageView.frame.size.width, imageView.frame.size.height) animated:NO]; }所以从这个例子中能学习到如何灵活地嵌套和组合多种UI组件,并把事件侦听delegate出来。