使用 VMware Server2 在 Oracle Enterprise Linux 上安装 Oracle11gR2 RAC
安装环境:
- Oracle Enterprise Linux 5.6 VMware Server2Oracle 11g Release 2 (11.2.0.3) Software (64 bit)
1. 安装Vmware server2
Linux版本安装:
# rpm -Uvh VMware-server*.rpm
Preparing... ########################################### [100%]
1:VMware-server ########################################### [100%]
The installation of VMware Server 2.0.0 for Linux completed successfully.
You can decide to remove this software from your system at any time by
invoking the following command: "rpm -e VMware-server".
Before running VMware Server for the first time, you need to
configure it for your running kernel by invoking the
following command: "/usr/bin/vmware-config.pl".
Enjoy,
--the VMware team
#
windows版本安装:
一直点下一步就可以了。
安装完成后客户端访问:
- http://machine-name:8222 https://machine-name:8333
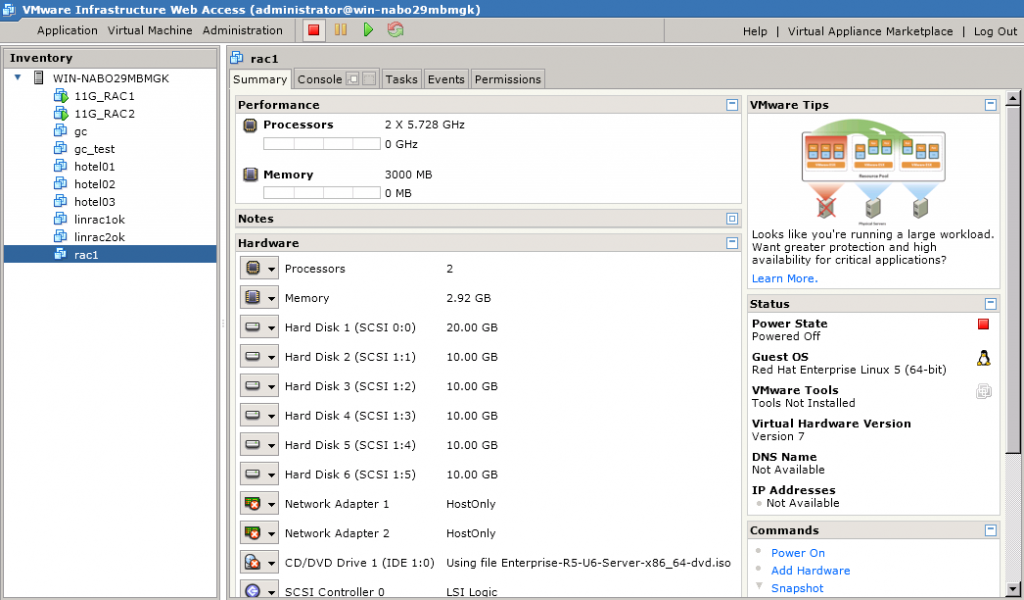
2. 虚拟机系统配置
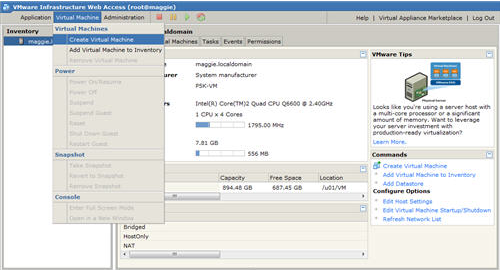
创建两个虚拟机RAC节点,当安装完成一个后可以复制成另一个。
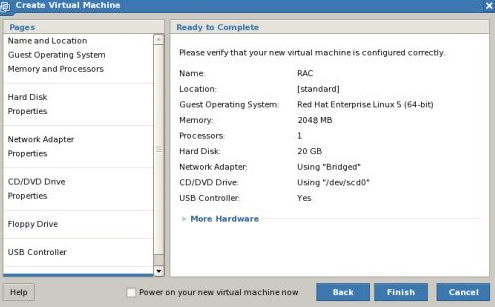
Click the "Virtual Machine > Create Virtual Machine" menu option, or click the "Create Virtual Machine" link on the bottom right of the console.
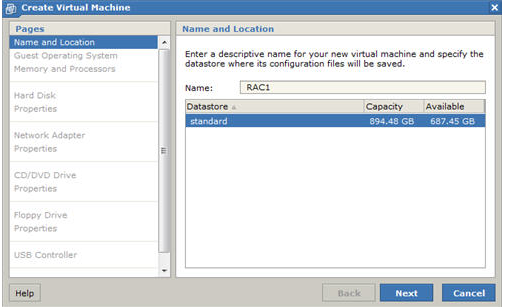
Enter the name "RAC1" and accept the standard datastore by clicking the "Next" button.
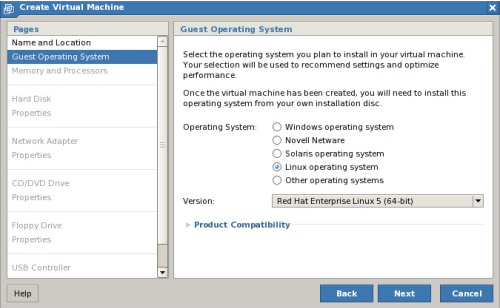
Select the "Linux operating system" option, and set the version to "Red Hat Enterprise Linux 5 (64-bit)", then click the "Next" button.
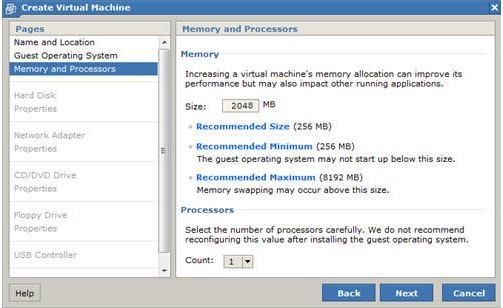
Enter the required amount of memory and number of CPUs for the virtual machine, then click the "Next" button. You should enter a minimum of 2048MB of memory.
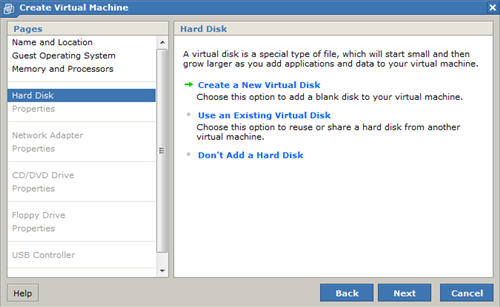
Click on the "Create a New Virtual Disk" link or click the "Next" button.
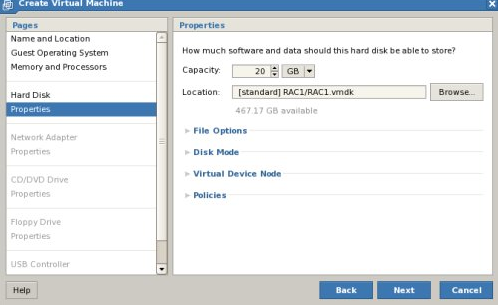
Set the disk size to "20 GB" and click the "Next" button.
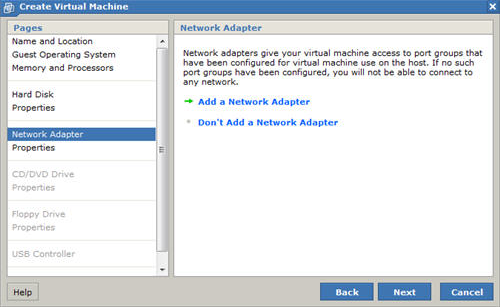
Click the "Add a Network Adapter" link or click the "Next" button.
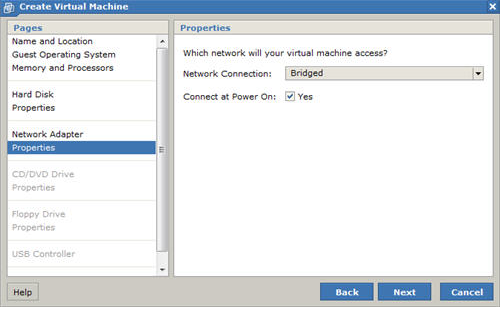
Select the "Bridged" option and click the "Next" button.
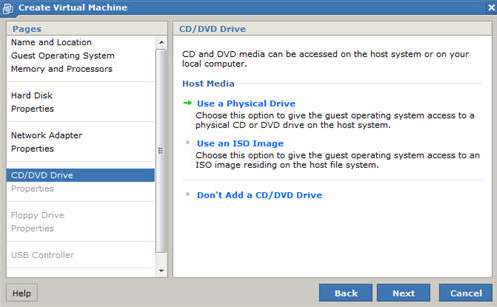
Click the "Use a Physical Drive" link, or click the "Next" button.
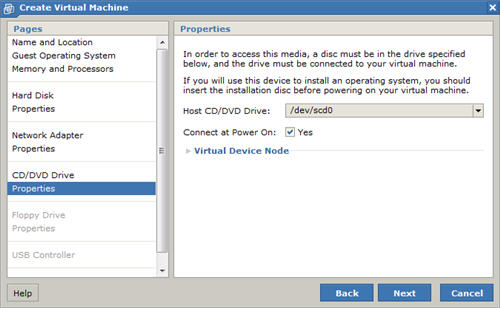
Accept the DVD properties by clicking the "Next" button.
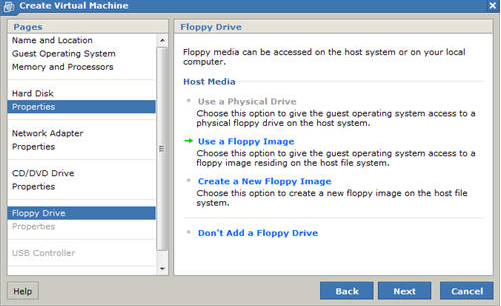
Click the "Don't Add a Floppy Drive" link.
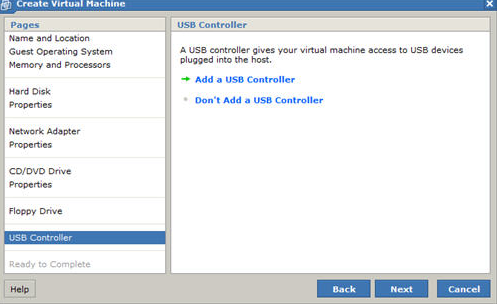
Click the "Add a USB Controller" link, or click the "Next" button.

Click the "Add a USB Controller" link, or click the "Next" button.
Click the "Finish" button to create the virtual machine.
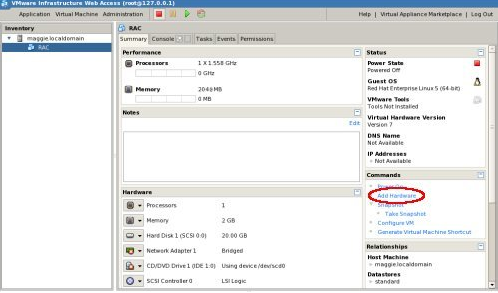
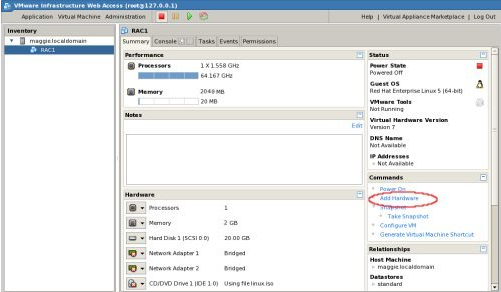
Highlight the "RAC1" VM in the "Inventory" pane, then click the "Add Hardware" link in the "Commands" section to the right.
Click the "Network Adapter" link.
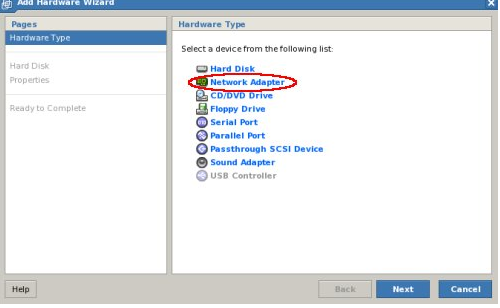
Select the "Bridged" option and click the "Next" button.

Click the "Finish" button.

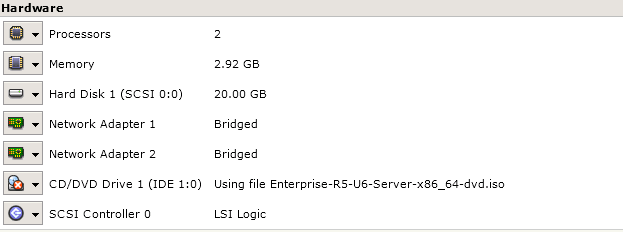
虚拟机配置完成,下面安装系统。
实际安装配置:
3. 安装linux系统
空间分配:
Swap 2.92G(最小值,否则安装oracle时检测会出现警告)
/Boot 100M
/ 17G
建议安装组件如下:
- GNOME Desktop Environment Editors Graphical Internet Text-based Internet Development Libraries Development Tools Server Configuration Tools Administration Tools Base System Tools X Window System
注意:选择系统工具组件时手动选上oracleasm*、sysstat*组件。
IP配置:
- hostname: rac1.localdomain IP Address eth0: 192.168.2.101 (public address) Default Gateway eth0: 192.168.2.1 (public address)Mask 255.255.255.0IP Address eth1: 192.168.0.101 (private address)Default Gateway eth1: noneMask 255.255.255.0
检查下面的安装包:
# For OEL, use relevant versions of the following packages from your media.
rpm -Uvh oracleasm-2.6.18-194.el5-2.0.5-1.el5.x86_64.rpm \
oracleasm-support-2.1.3-1.el5.x86_64.rpm
[root@hotel01 ~]# rpm -q --qf '%{NAME}-%{VERSION}-%{RELEASE} (%{ARCH})\n' \binutils compat-libstdc++-33 elfutils-libelf elfutils-libelf-devel gcc gcc-c++ glibc glibc-common glibc-devel glibc-headers ksh libaio libaio-devel libgomp- libgcc libstdc++ libstdc++-devel make numactl-devel- sysstat unixODBC unixODBC-devel
binutils-2.17.50.0.6-14.el5 (x86_64)
compat-libstdc++-33-3.2.3-61 (x86_64)
compat-libstdc++-33-3.2.3-61 (i386)
elfutils-libelf-0.137-3.el5 (x86_64)
elfutils-libelf-devel-0.137-3.el5 (x86_64)
gcc-4.1.2-48.el5 (x86_64)
gcc-c++-4.1.2-48.el5 (x86_64)
glibc-2.5-49 (i686)
glibc-2.5-49 (x86_64)
glibc-common-2.5-49 (x86_64)
glibc-devel-2.5-49 (x86_64)
glibc-devel-2.5-49 (i386)
glibc-headers-2.5-49 (x86_64)
ksh-20100202-1.el5 (x86_64)
libaio-0.3.106-5 (i386)
libaio-0.3.106-5 (x86_64)
libaio-devel-0.3.106-5 (i386)
libaio-devel-0.3.106-5 (x86_64)
libgomp-4.4.0-6.el5 (x86_64)
libgcc-4.1.2-48.el5 (i386)
libgcc-4.1.2-48.el5 (x86_64)
libstdc++-4.1.2-48.el5 (x86_64)
libstdc++-4.1.2-48.el5 (i386)
libstdc++-devel-4.1.2-48.el5 (x86_64)
make-3.81-3.el5 (x86_64)
numactl-devel-0.9.8-11.el5 (x86_64)
numactl-devel-0.9.8-11.el5 (i386)
sysstat-7.0.2-3.el5 (x86_64)
unixODBC-2.2.11-7.1 (x86_64)
unixODBC-2.2.11-7.1 (i386)
unixODBC-devel-2.2.11-7.1 (i386)
unixODBC-devel-2.2.11-7.1 (x86_64)
# Install the following package from the Oracle grid media.
cd /your/path/to/grid/rpm
rpm -Uvh cvuqdisk*
4. ORACLE安装先决条件
使共享内存足够大:
[root@rac1 ~]# df -h
文件系统 容量 已用可用已用%挂载点
/dev/sda2 17G 3.2G 13G 21% /
/dev/sda1 99M 30M 65M 32% /boot
tmpfs 1.5G 0 1.5G 0% /dev/shm
如果不足够大,用如下方法:
# umount tmpfs
# mount -t tmpfs shmfs -o size=1500m /dev/shm
# vi /etc/fstab
tmpfs /dev/shm tmpfs size=1500m 0 0
修改各种参数文件:
# vi /etc/hosts
127.0.0.1 localhost.localdomain localhost
# Public
192.168.2.101 rac1.localdomain rac1
192.168.2.102 rac2.localdomain rac2
# Private
192.168.0.101 rac1-priv.localdomain rac1-priv
192.168.0.102 rac2-priv.localdomain rac2-priv
# Virtual
192.168.2.111 rac1-vip.localdomain rac1-vip
192.168.2.112 rac2-vip.localdomain rac2-vip
# SCAN
192.168.2.201 rac-scan.localdomain rac-scan
#vi /etc/sysctl.conf
fs.aio-max-nr = 1048576
fs.file-max = 6815744
kernel.shmall = 2097152
kernel.shmmax = 1054504960
kernel.shmmni = 4096
# semaphores: semmsl, semmns, semopm, semmni
kernel.sem = 250 32000 100 128
net.ipv4.ip_local_port_range = 9000 65500
net.core.rmem_default=262144
net.core.rmem_max=4194304
net.core.wmem_default=262144
net.core.wmem_max=1048586
#sysctl -p
#vi /etc/security/limits.conf
oracle soft nproc 2047
oracle hard nproc 16384
oracle soft nofile 1024
oracle hard nofile 65536
vi /etc/pam.d/login
session required pam_limits.so
cat /etc/selinux/config
SELINUX=disabled
时间同步配置:
时间同步有两种方法:
1. 或者配置ctssd(Oracle Cluster Time Synchronization Service);
2. 或者配置NTP服务。
配置ctssd:
如果要使用ctssd服务同步时间,要先必须卸载集群所有节点上的NTP配置
--卸载NTP配置
# service ntpd stop
Shutting down ntpd: [ OK ]
# chkconfig ntpd off
# mv /etc/ntp.conf /etc/ntp.conf.org
# rm /var/run/ntpd.pid
--配置NTP服务
如果使用NTP,必须在"/etc/sysconfig/ntpd"文件中添加"-x"选项
OPTIONS="-x -u ntp:ntp -p /var/run/ntpd.pid"
Oracle相关配置文件:
groupdel oinstall
groupdel dba
userdel oracle
groupadd -g 1000 oinstall
groupadd -g 1200 dba
useradd -u 1100 -g oinstall -G dba oracle
passwd oracle
mkdir /112db
mkdir -p /u01/app/11.2.0/grid
mkdir -p /u01/app/oracle/product/11.2.0/db_1
chown -R oracle:oinstall /u01
chown -R oracle:oinstall /112db
chmod -R 775 /u01
su – oracle
vi .bash_profile
export TMP=/tmp
export TMPDIR=$TMP
export ORACLE_TERM=xterm
export ORACLE_BASE=/u01/app/oracle
export ORACLE_HOME=$ORACLE_BASE/product/11.2.0/db_1
export ORACLE_GRID= /u01/app/11.2.0/grid
export ORACLE_SID=racdb1
export PATH=/usr/sbin:$PATH
export PATH=$ORACLE_HOME/bin:$ORACLE_GRID/bin:$PATH
exportLD_LIBRARY_PATH=$ORACLE_HOME/lib:/lib64:/usr/lib64:/usr/local/lib64:/usr/X11R6/lib64
export CLASSPATH=$ORACLE_HOME/JRE:$ORACLE_HOME/jlib:$ORACLE_HOME/rdbms/jlib
export NLS_LANG="SIMPLIFIED CHINESE_CHINA.ZHS16GBK"
export ALERT=$ORACLE_BASE/diag/rdbms/$ORACLE_SID/$ORACLE_SID/trace
umask 022
if [ $USER = "oracle" ]; then
if [ $SHELL = "/bin/ksh" ]; then
ulimit -p 16384
ulimit -n 65536
else
ulimit -u 16384 -n 65536
fi
fi
5. 创建共享磁盘
Shutdown rac1虚拟机:
# shutdown -h now
创建存放共享磁盘的目录:
# mkdir -p /u01/VM/sharedisk
使用Vmware创建共享磁盘:
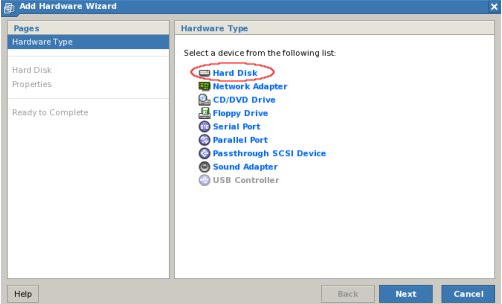
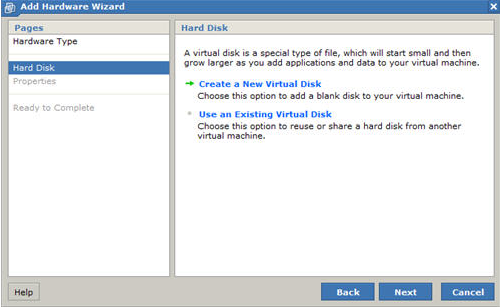
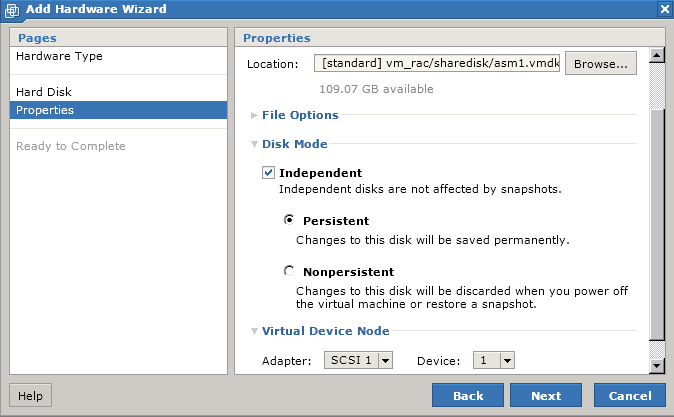

重复上面的步骤再添加4块硬盘:
- File Name: [standard] sharedisk/asm2.vmdk
Virtual Device Node: SCSI 1:2
Mode: Independent and PersistentFile Name: [standard] sharedisk/asm3.vmdk
Virtual Device Node: SCSI 1:3
Mode: Independent and PersistentFile Name: [standard] sharedisk/asm4.vmdk
Virtual Device Node: SCSI 1:4
Mode: Independent and PersistentFile Name: [standard] sharedisk/asm5.vmdk
Virtual Device Node: SCSI 1:5
Mode: Independent and Persistent
编辑/vm_rac/rac1.vmx文件,如下内容:
disk.locking = "FALSE"
diskLib.dataCacheMaxSize = "0"
diskLib.dataCacheMaxReadAheadSize = "0"
diskLib.dataCacheMinReadAheadSize = "0"
diskLib.dataCachePageSize = "4096"
diskLib.maxUnsyncedWrites = "0"
scsi1.present = "TRUE"
scsi1.sharedBus = "VIRTUAL"
scsi1.virtualDev = "lsilogic"
scsi1:1.present = "TRUE"
scsi1:1.fileName = "F:\Virtual Machines\vm_rac\sharedisk\asm1.vmdk"
scsi1:1.writeThrough = "TRUE"
scsi1:1.mode = "independent-persistent"
scsi1:1.deviceType = "plainDisk"
scsi1:1.redo = ""
scsi1:2.present = "TRUE"
scsi1:2.fileName = "F:\Virtual Machines\vm_rac\sharedisk\asm2.vmdk"
scsi1:2.writeThrough = "TRUE"
scsi1:2.mode = "independent-persistent"
scsi1:2.deviceType = "plainDisk"
scsi1:2.redo = ""
scsi1:3.present = "TRUE"
scsi1:3.fileName = "F:\Virtual Machines\vm_rac\sharedisk\asm3.vmdk"
scsi1:3.writeThrough = "TRUE"
scsi1:3.mode = "independent-persistent"
scsi1:3.deviceType = "plainDisk"
scsi1:3.redo = ""
scsi1:4.present = "TRUE"
scsi1:4.fileName = "F:\Virtual Machines\vm_rac\sharedisk\asm4.vmdk"
scsi1:4.writeThrough = "TRUE"
scsi1:4.mode = "independent-persistent"
scsi1:4.deviceType = "plainDisk"
scsi1:4.redo = ""
scsi1:5.present = "TRUE"
scsi1:5.fileName = "F:\Virtual Machines\vm_rac\sharedisk\asm5.vmdk"
scsi1:5.writeThrough = "TRUE"
scsi1:5.mode = "independent-persistent"
scsi1:5.deviceType = "plainDisk"
scsi1:5.redo = ""
启动
# cd /dev
# ls sd*
sda sda1 sda2 sdb sdc sdd sde sdf
[root@rac1 ~]#
fdisk /dev/sdb
n p 1 w
# cd /dev
# ls sd*
sda sda1 sda2 sdb sdb1 sdc sdc1 sdd sdd1 sde sde1 sdf sdf1
#
确定内核版本,从oracle OTN网站下asmlib。
# uname -rm
2.6.32-100.26.2.el5 x86_64
如果oracle linux系统安装了asmlib组件可省略上步。
rpm –vih asmlib
/
[root@rac1 ~]# oracleasm configure -i
Configuring the Oracle ASM library driver.
This will configure the on-boot properties of the Oracle ASM library
driver. The following questions will determine whether the driver is
loaded on boot and what permissions it will have. The current values
will be shown in brackets ('[]'). Hitting <ENTER> without typing an
answer will keep that current value. Ctrl-C will abort.
Default user to own the driver interface [oracle]: oracle
Default group to own the driver interface [dba]: dba
Start Oracle ASM library driver on boot (y/n) [y]: y
Scan for Oracle ASM disks on boot (y/n) [y]: y
Writing Oracle ASM library driver configuration: done
[root@rac1 ~]# /usr/sbin/oracleasm listdisks
[root@rac1 dev]# /usr/sbin/oracleasm init
Creating /dev/oracleasm mount point: /dev/oracleasm
Loading module "oracleasm": oracleasm
Mounting ASMlib driver filesystem: /dev/oracleasm
[root@rac1 dev]# /usr/sbin/oracleasm createdisk DISK1 /dev/sdb1
Writing disk header: done
Instantiating disk: done
[root@rac1 dev]# /usr/sbin/oracleasm createdisk DISK2 /dev/sdc1
Writing disk header: done
Instantiating disk: done
[root@rac1 dev]# /usr/sbin/oracleasm createdisk DISK3 /dev/sdd1
Writing disk header: done
Instantiating disk: done
[root@rac1 dev]# /usr/sbin/oracleasm createdisk DISK4 /dev/sde1
Writing disk header: done
Instantiating disk: done
[root@rac1 dev]# /usr/sbin/oracleasm createdisk DISK5 /dev/sdf1
Writing disk header: done
Instantiating disk: done
--非必须的
[root@rac1 dev]# /usr/sbin/oracleasm scandisks
Reloading disk partitions: done
Cleaning any stale ASM disks...
Scanning system for ASM disks...
[root@rac1 dev]# /usr/sbin/oracleasm listdisks
DISK1
DISK2
DISK3
DISK4
DISK5
6. clone另一个节点机器rac2
停止节点rac1:
# shutdown -h now
Copy rac1目录到rac2目录
添加新的服务器rac2
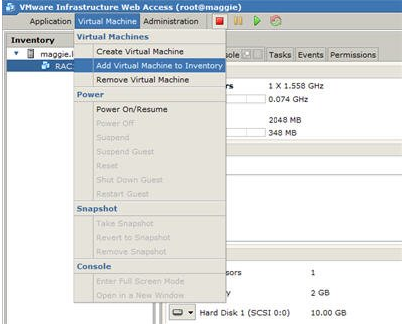
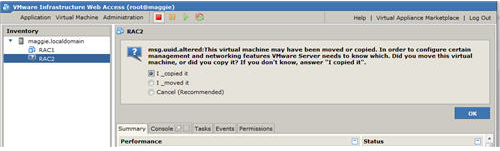
启动rac2节点
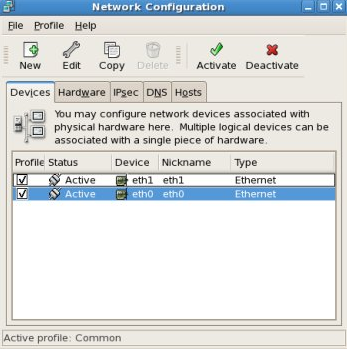
登录rac2修改网络配置:
删除%.bak网络设备
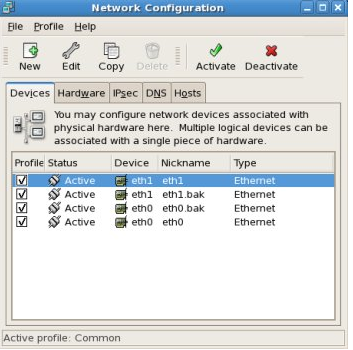
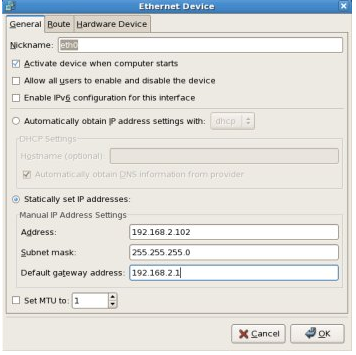
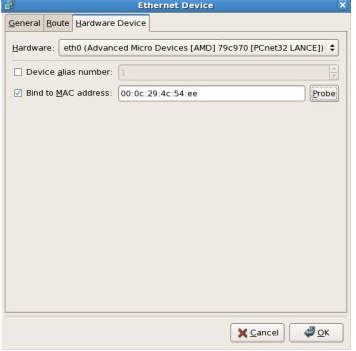
重复上面eth0的网络配置,来配置eth1;IP为192.168.0.102;默认gateway不用配置。
修改主机名:

保存并击活
修改参数文件
/home/oracle/.bash_profile
export ORACLE_SID=rac2
启动rac1节点:
分别验证rac1,rac2网络配置的连通性:
ping -c 3 rac1
ping -c 3 rac1-priv
ping -c 3 rac2
ping -c 3 rac2-priv
这样,虚拟机配置完成。
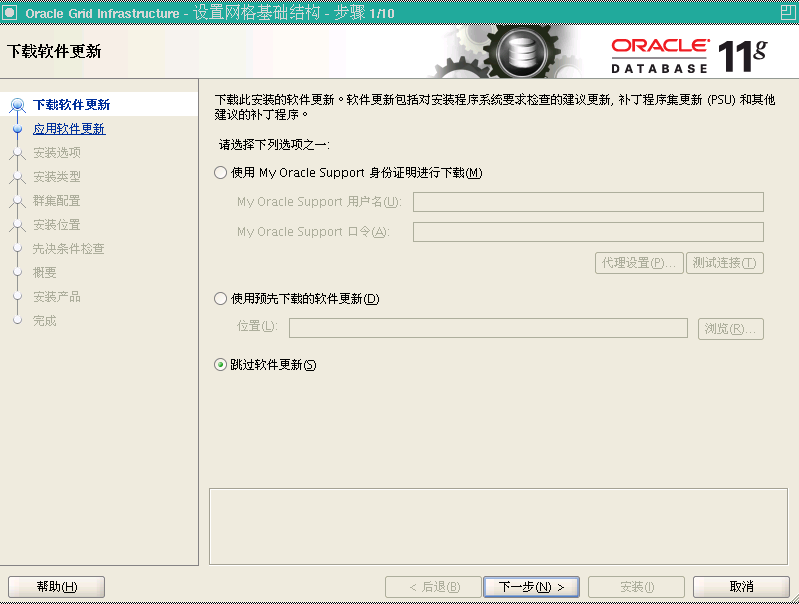
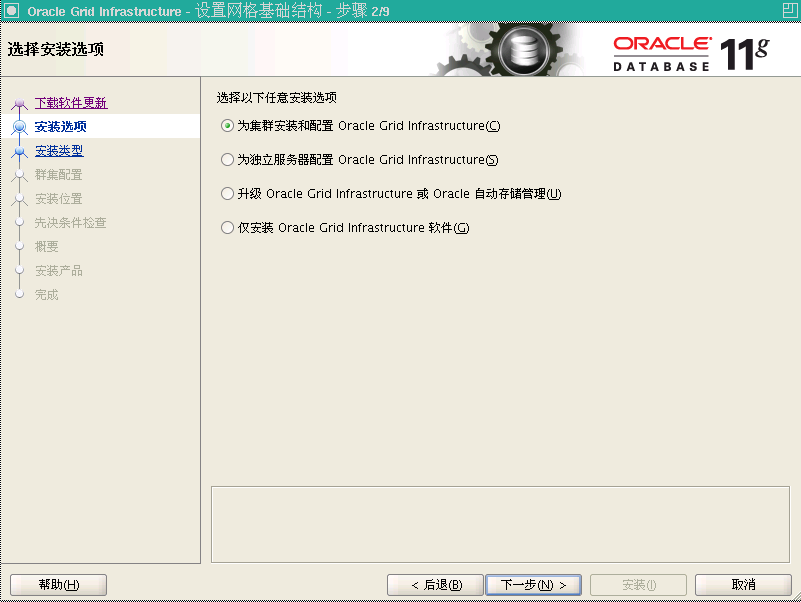
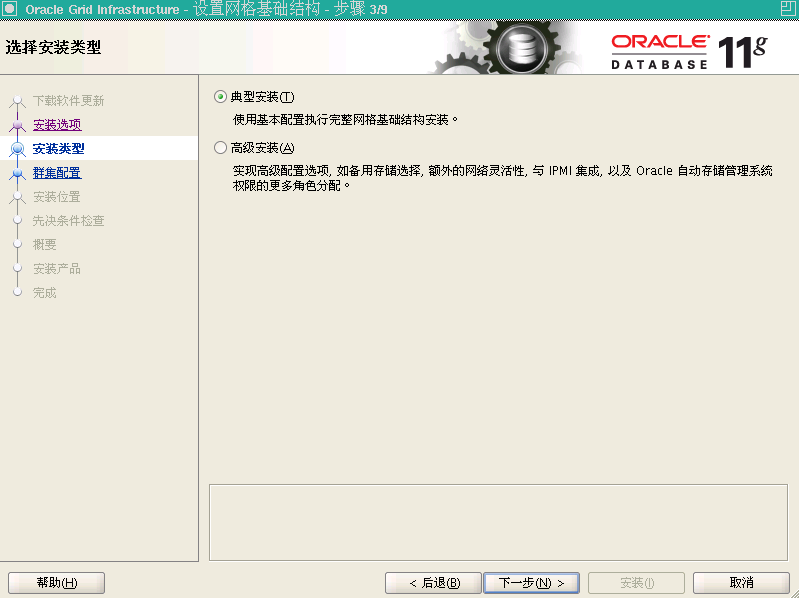
7. 安装GI(Grid Infrastructure)
开启rac1,rac2
登录rac1
./runInstaller
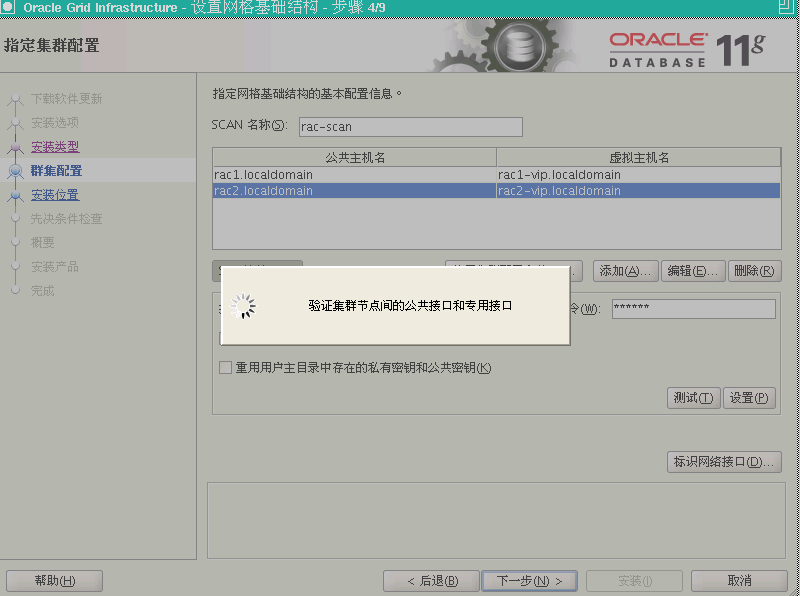
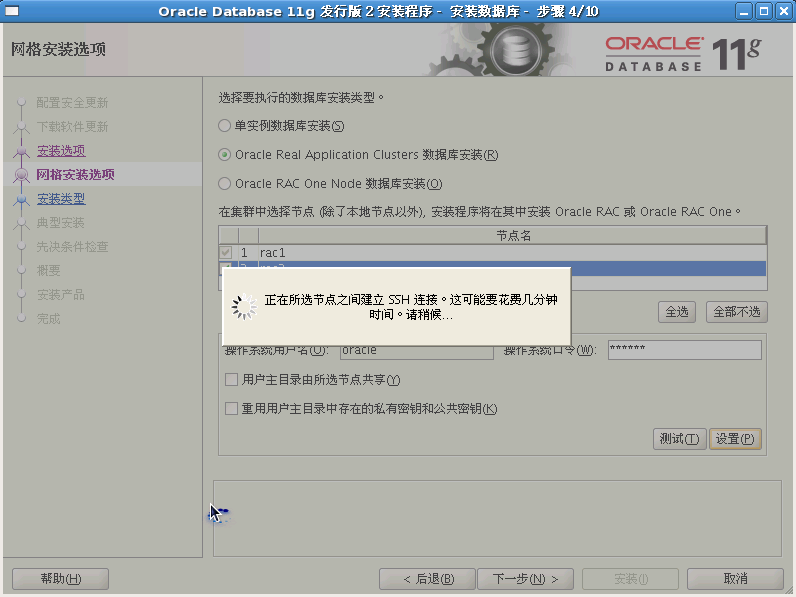
点“添加”,添加rac2节点
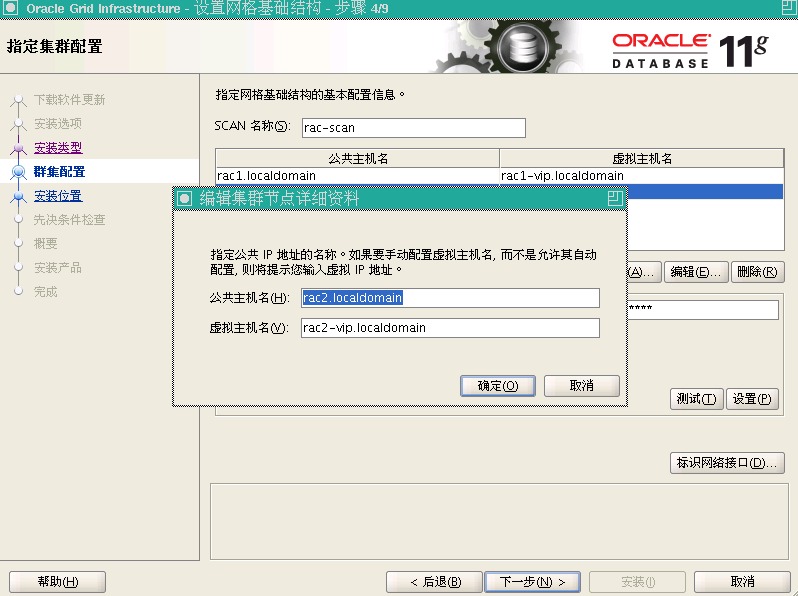
点“SSH连接”,然后输入oracle用户密码,再点击“设置”配置SSH连接。
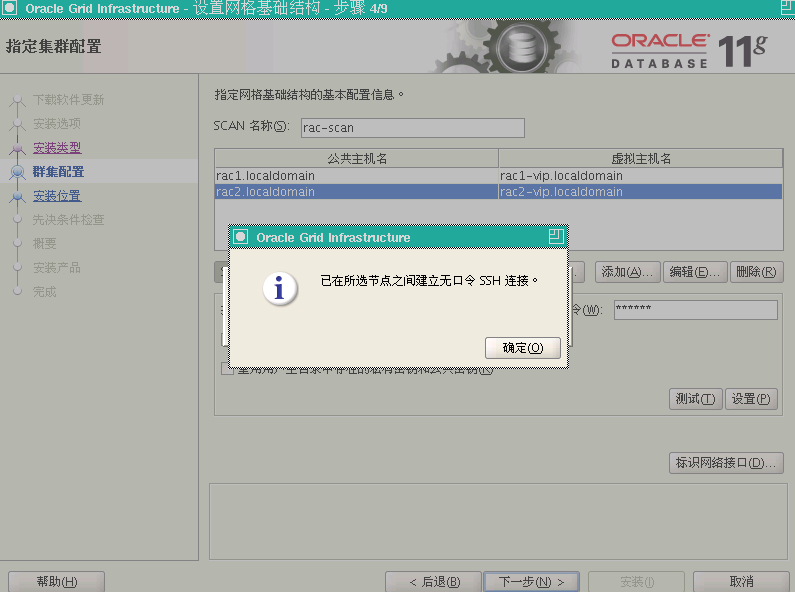
点击“测试”连接。
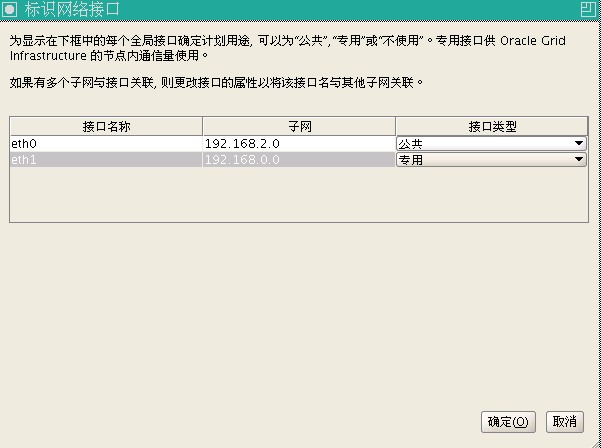
点击“标识网络接口”,检查公共、私有网络的正确性。然后返回点击“下一步”
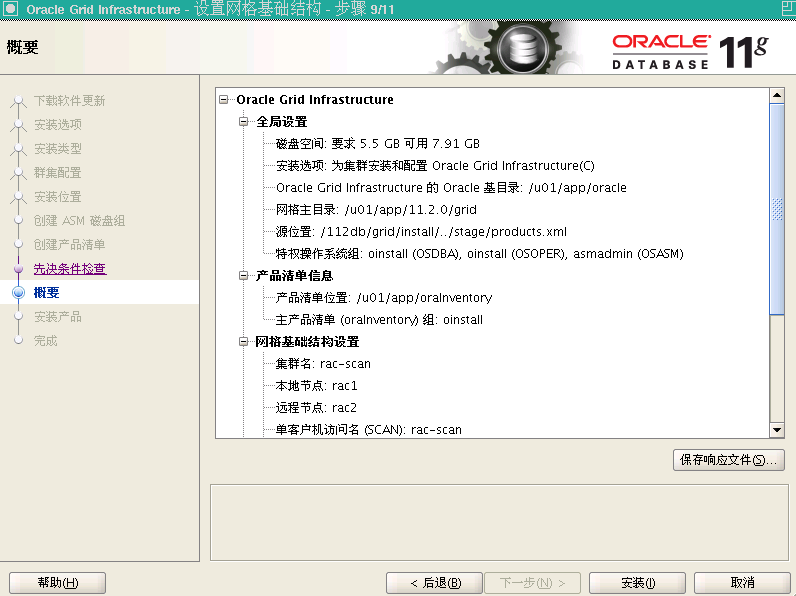
软件位置:/u01/app/ 11.2.0/grid
集群注册表存储类型:Oracle自动存储管理
用OSASM组:oinstall
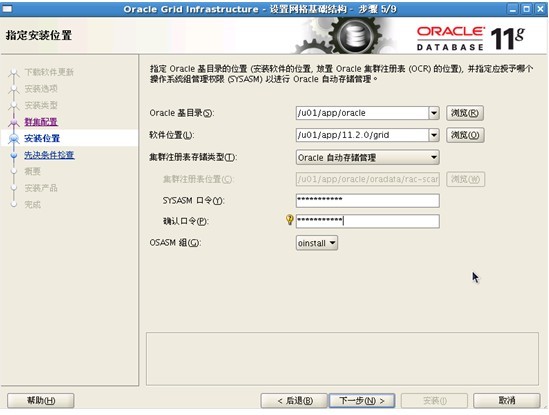
注意:这里一定要选定对的OSASM组,不然会出现问题1
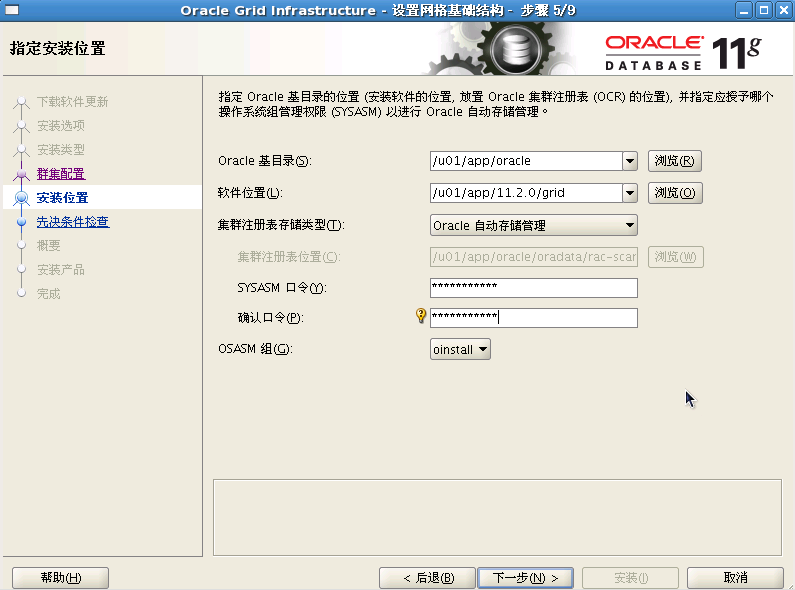
Sysasm密码:Oracle123
确认口令:Oracle123
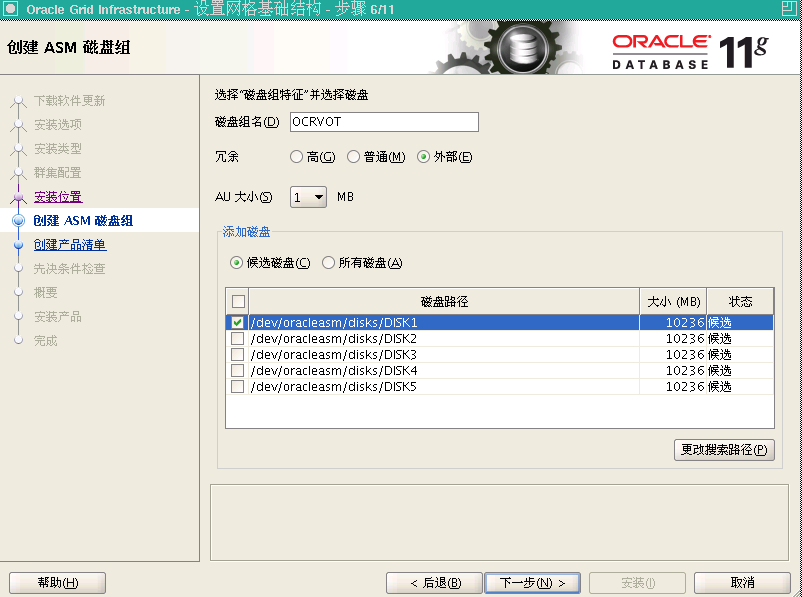
选择所有5块磁盘:
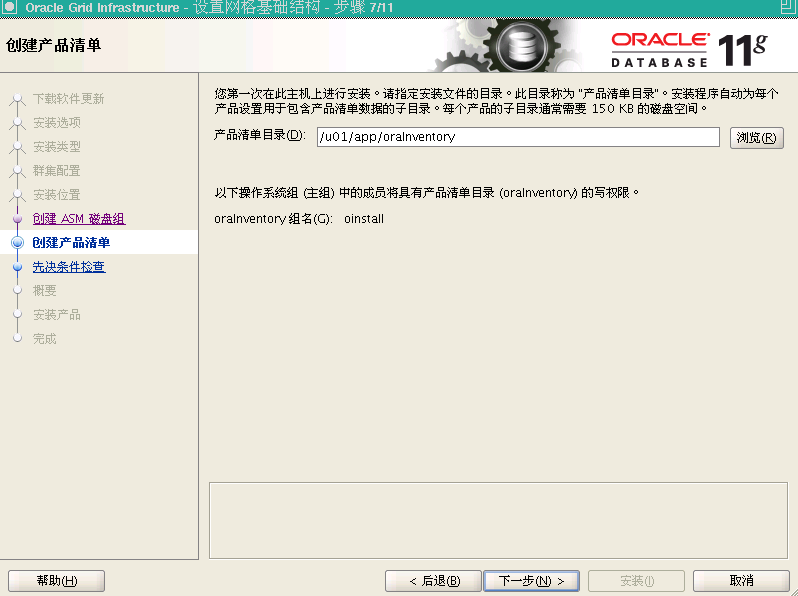
接受默认目录,点下一步:
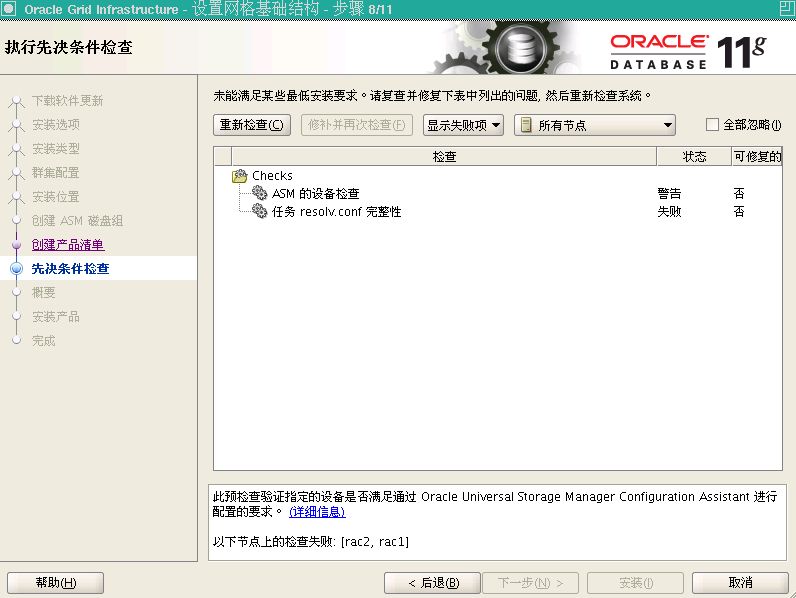
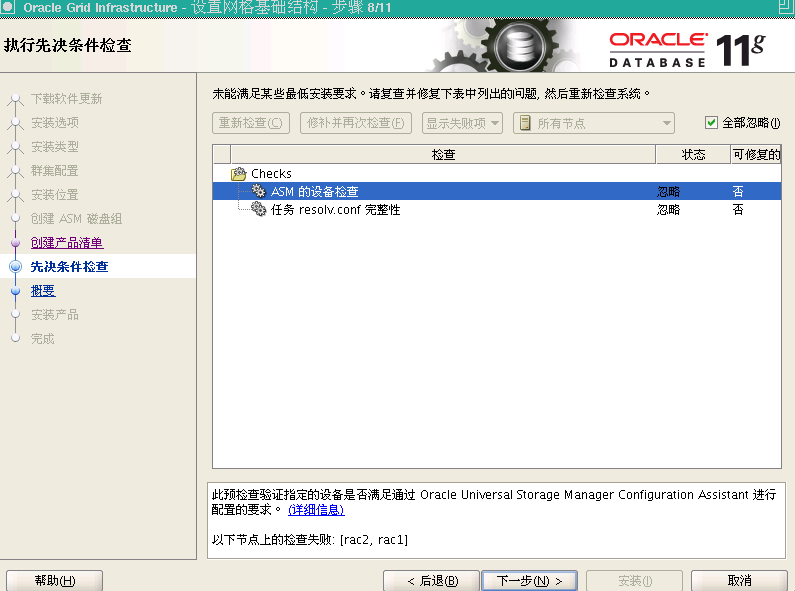
检测出现失败项,可忽略。
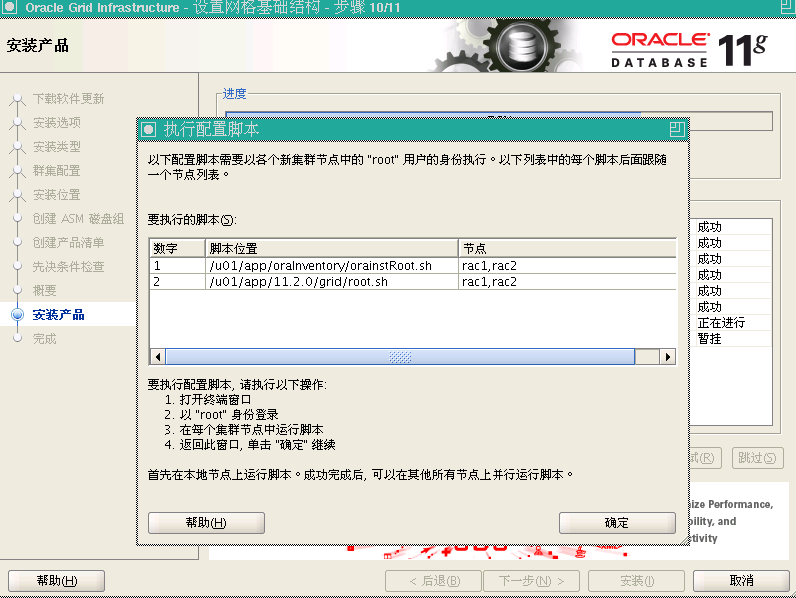
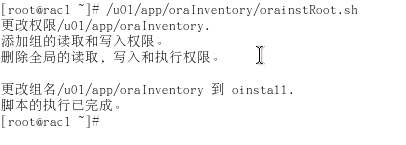
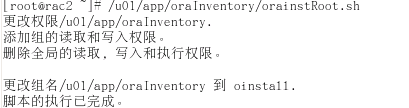
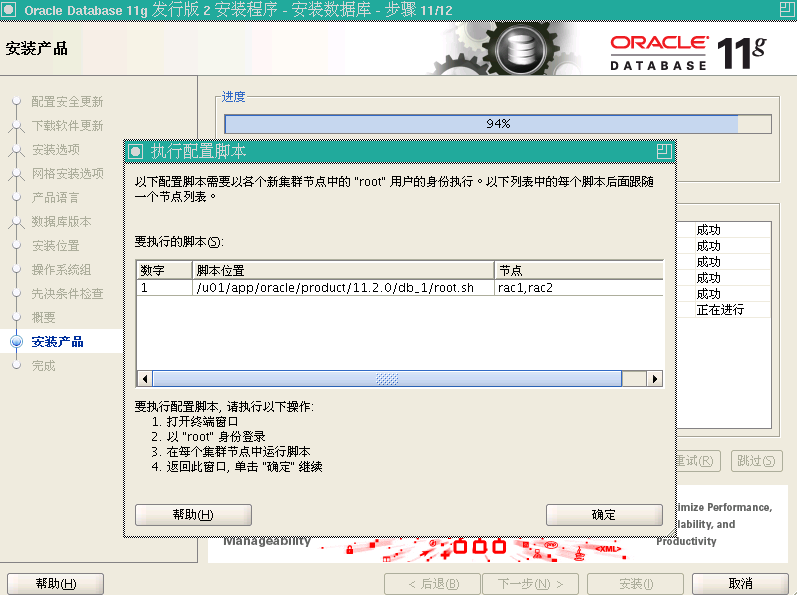
在rac1,rac2分别执行orainstRoot.sh,root.sh脚本。
Rac1执行root脚本:
[root@rac1 rpm]# /u01/app/11.2.0/grid/root.sh
Performing root user operation for Oracle 11g
The following environment variables are set as:
ORACLE_OWNER= oracle
ORACLE_HOME= /u01/app/11.2.0/grid
Enter the full pathname of the local bin directory: [/usr/local/bin]:
Copying dbhome to /usr/local/bin ...
Copying oraenv to /usr/local/bin ...
Copying coraenv to /usr/local/bin ...
Creating /etc/oratab file...
Entries will be added to the /etc/oratab file as needed by
Database Configuration Assistant when a database is created
Finished running generic part of root script.
Now product-specific root actions will be performed.
Using configuration parameter file: /u01/app/11.2.0/grid/crs/install/crsconfig_params
Creating trace directory
User ignored Prerequisites during installation
OLR initialization - successful
root wallet
root wallet cert
root cert export
peer wallet
profile reader wallet
pa wallet
peer wallet keys
pa wallet keys
peer cert request
pa cert request
peer cert
pa cert
peer root cert TP
profile reader root cert TP
pa root cert TP
peer pa cert TP
pa peer cert TP
profile reader pa cert TP
profile reader peer cert TP
peer user cert
pa user cert
Adding Clusterware entries to inittab
CRS-2672: Attempting to start 'ora.mdnsd' on 'rac1'
CRS-2676: Start of 'ora.mdnsd' on 'rac1' succeeded
CRS-2672: Attempting to start 'ora.gpnpd' on 'rac1'
CRS-2676: Start of 'ora.gpnpd' on 'rac1' succeeded
CRS-2672: Attempting to start 'ora.cssdmonitor' on 'rac1'
CRS-2672: Attempting to start 'ora.gipcd' on 'rac1'
CRS-2676: Start of 'ora.gipcd' on 'rac1' succeeded
CRS-2676: Start of 'ora.cssdmonitor' on 'rac1' succeeded
CRS-2672: Attempting to start 'ora.cssd' on 'rac1'
CRS-2672: Attempting to start 'ora.diskmon' on 'rac1'
CRS-2676: Start of 'ora.diskmon' on 'rac1' succeeded
CRS-2676: Start of 'ora.cssd' on 'rac1' succeeded
已成功创建并启动 ASM。
已成功创建磁盘组OCRVOT。
clscfg: -install mode specified
Successfully accumulated necessary OCR keys.
Creating OCR keys for user 'root', privgrp 'root'..
Operation successful.
CRS-4256: Updating the profile
Successful addition of voting disk a1a82d4f21474fd4bfed779eae24e1f0.
Successfully replaced voting disk group with +OCRVOT.
CRS-4256: Updating the profile
CRS-4266: Voting file(s) successfully replaced
## STATE File Universal Id File Name Disk group
-- ----- ----------------- --------- ---------
1. ONLINE a1a82d4f21474fd4bfed779eae24e1f0 (/dev/oracleasm/disks/DISK1) [OCRVOT]
Located 1 voting disk(s).
CRS-2672: Attempting to start 'ora.asm' on 'rac1'
CRS-2676: Start of 'ora.asm' on 'rac1' succeeded
CRS-2672: Attempting to start 'ora.OCRVOT.dg' on 'rac1'
CRS-2676: Start of 'ora.OCRVOT.dg' on 'rac1' succeeded
Configure Oracle Grid Infrastructure for a Cluster ... succeeded
Rac2执行root脚本:
[root@rac2 disks]# /u01/app/11.2.0/grid/root.sh
Performing root user operation for Oracle 11g
The following environment variables are set as:
ORACLE_OWNER= oracle
ORACLE_HOME= /u01/app/11.2.0/grid
Enter the full pathname of the local bin directory: [/usr/local/bin]:
Copying dbhome to /usr/local/bin ...
Copying oraenv to /usr/local/bin ...
Copying coraenv to /usr/local/bin ...
Creating /etc/oratab file...
Entries will be added to the /etc/oratab file as needed by
Database Configuration Assistant when a database is created
Finished running generic part of root script.
Now product-specific root actions will be performed.
Using configuration parameter file: /u01/app/11.2.0/grid/crs/install/crsconfig_params
Creating trace directory
User ignored Prerequisites during installation
OLR initialization - successful
Adding Clusterware entries to inittab
CRS-4402: CSS 守护程序已在独占模式下启动,但在节点 rac1 (编号为 1)上发现活动 CSS 守护程序,因此正在终止
An active cluster was found during exclusive startup, restarting to join the cluster
Configure Oracle Grid Infrastructure for a Cluster ... succeeded
执行完成后返回界面,点确定。


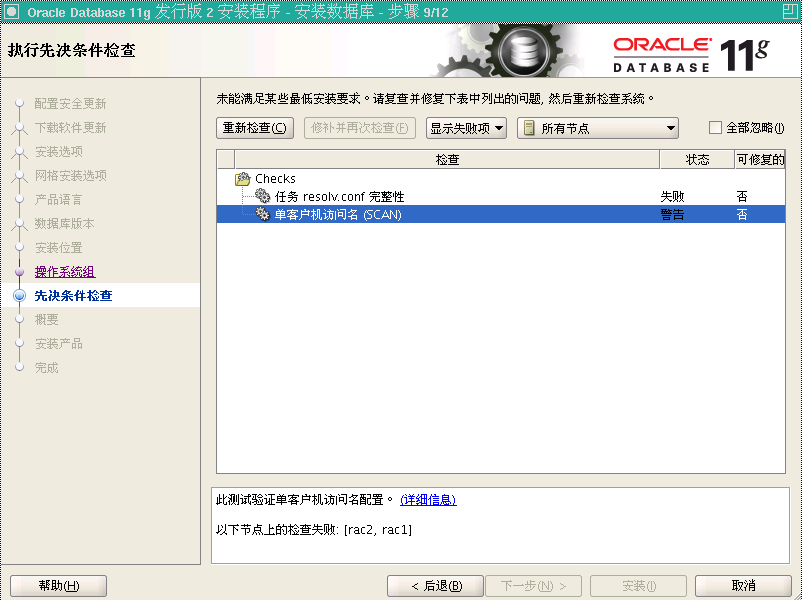
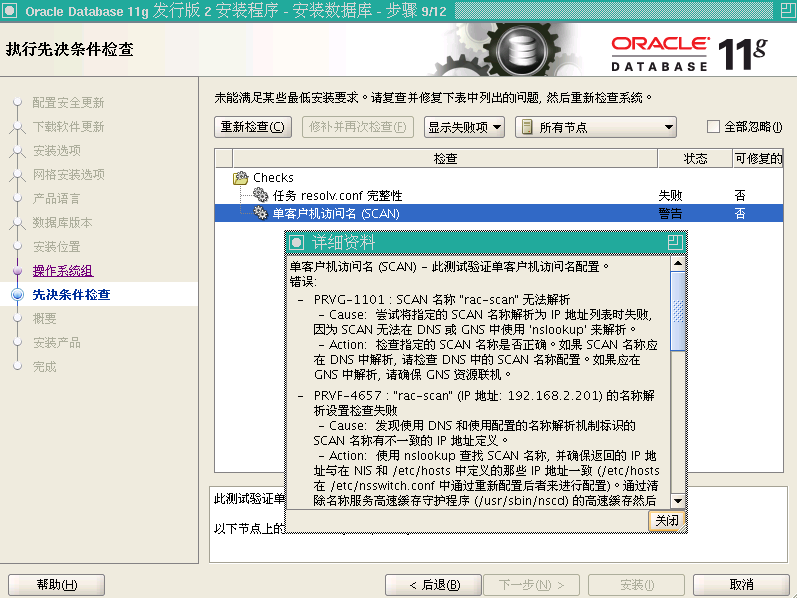
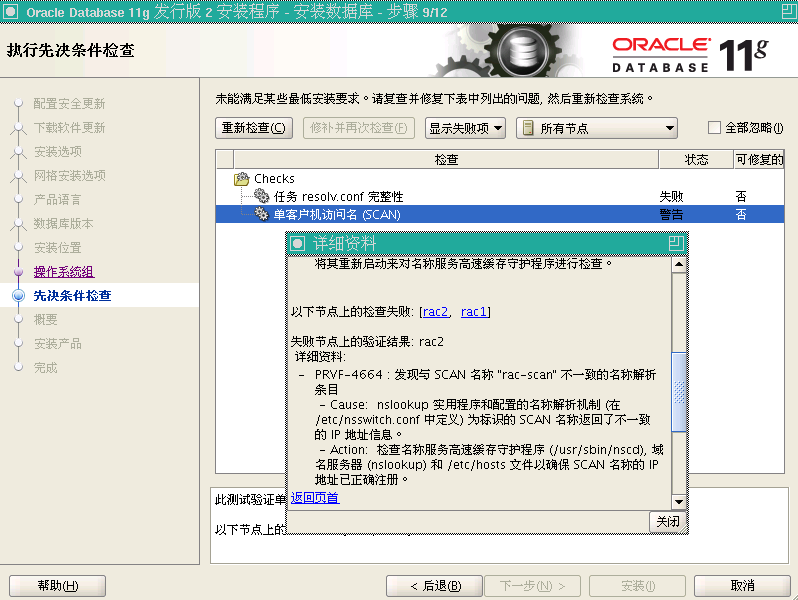
如果出现上面关于scan验证失败的错误,是因为没有使用DNS
INFO: Checking Single Client Access Name (SCAN)...
INFO: Checking name resolution setup for "rac-scan.localdomain"...
INFO: ERROR:
INFO: PRVF-4664 : Found inconsistent name resolution entries for SCAN name "rac-scan.localdomain"
INFO: ERROR:
INFO: PRVF-4657 : Name resolution setup check for "rac-scan.localdomain" (IP address: 192.168.2.201) failed
INFO: ERROR:
INFO: PRVF-4664 : Found inconsistent name resolution entries for SCAN name "rac-scan.localdomain"
INFO: Verification of SCAN VIP and Listener setup failed
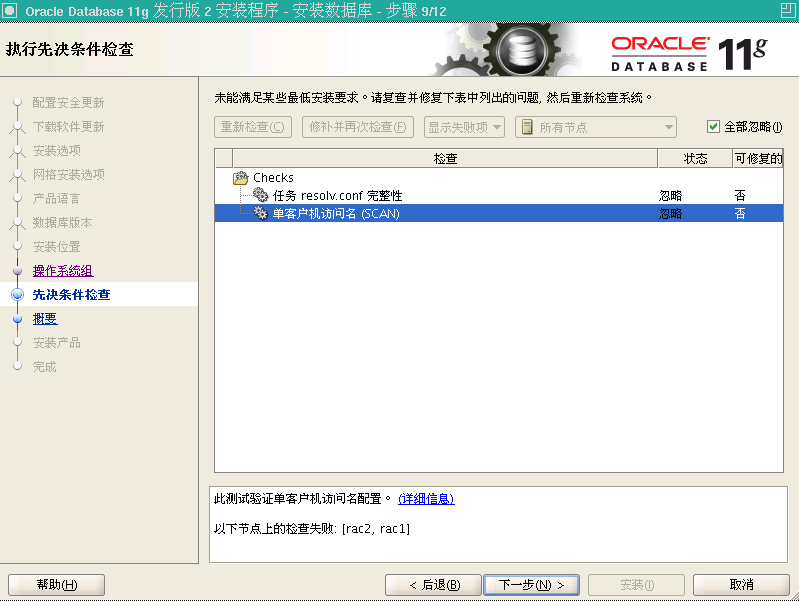
如果只存在这个错误,可以忽略,直接到下一步。
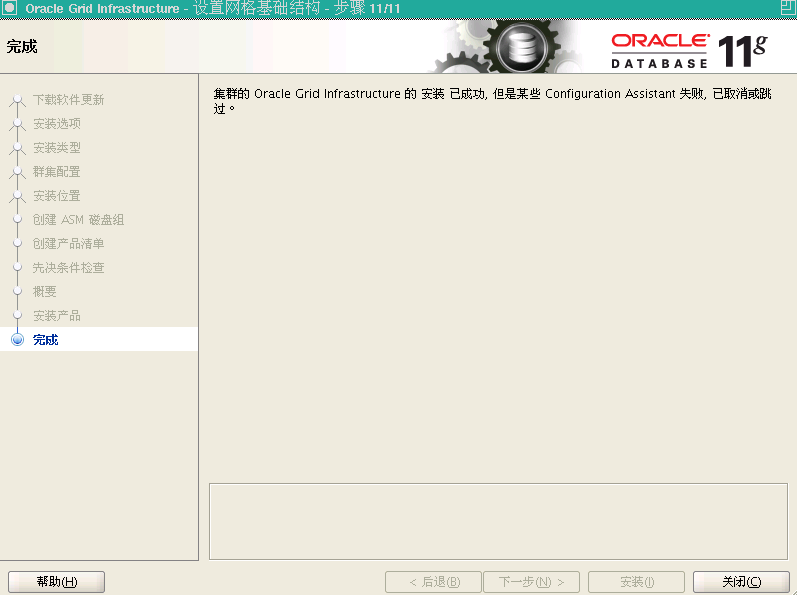
检查安装:

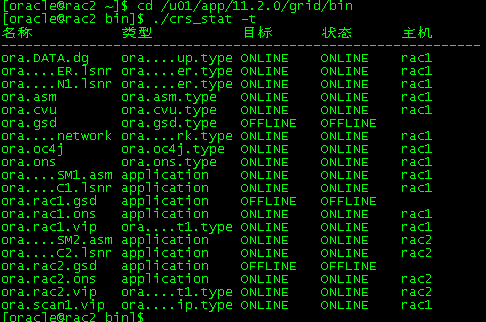
The grid infrastructure installation is now complete.
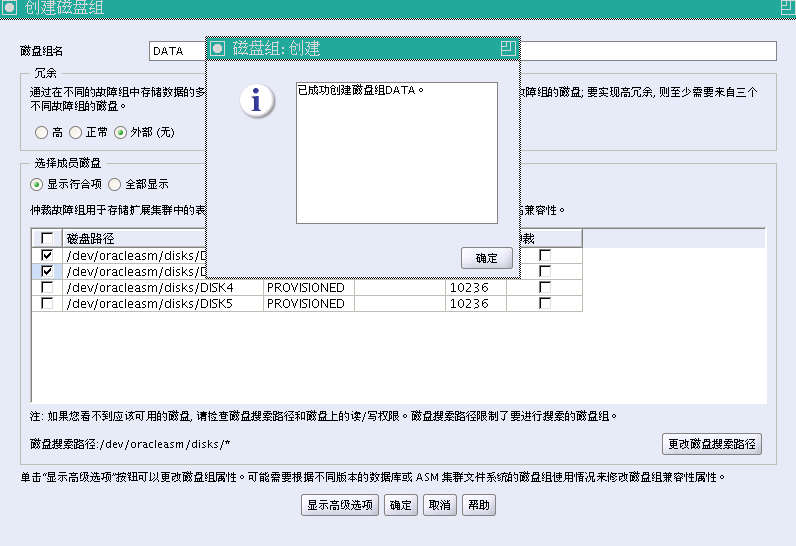
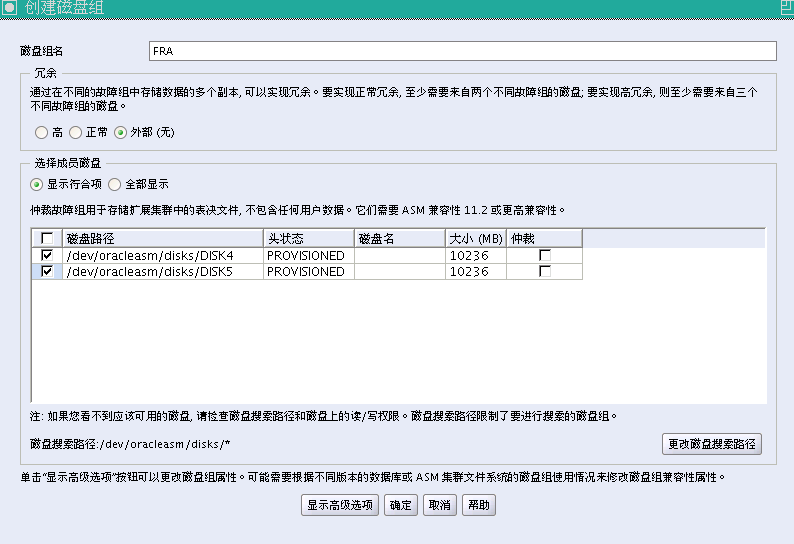
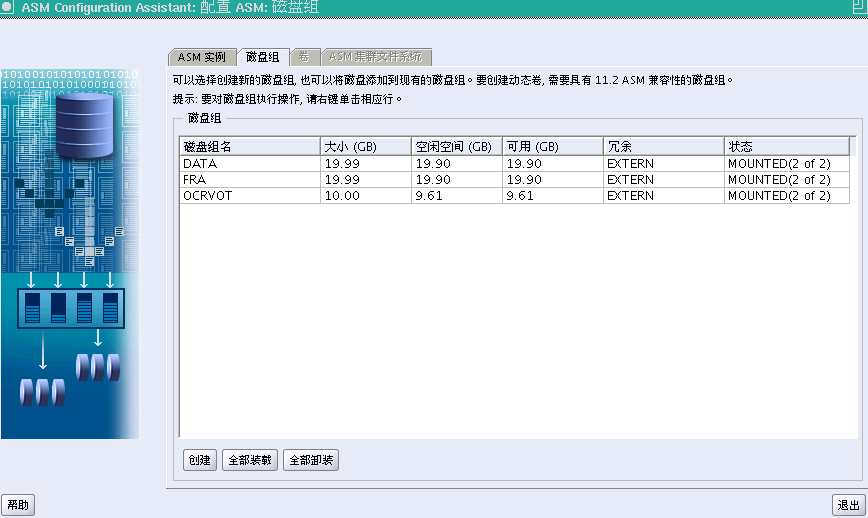
创建新的ASM磁盘组:
#cd /u01/app/11.2.0/grid/bin
#./asmca
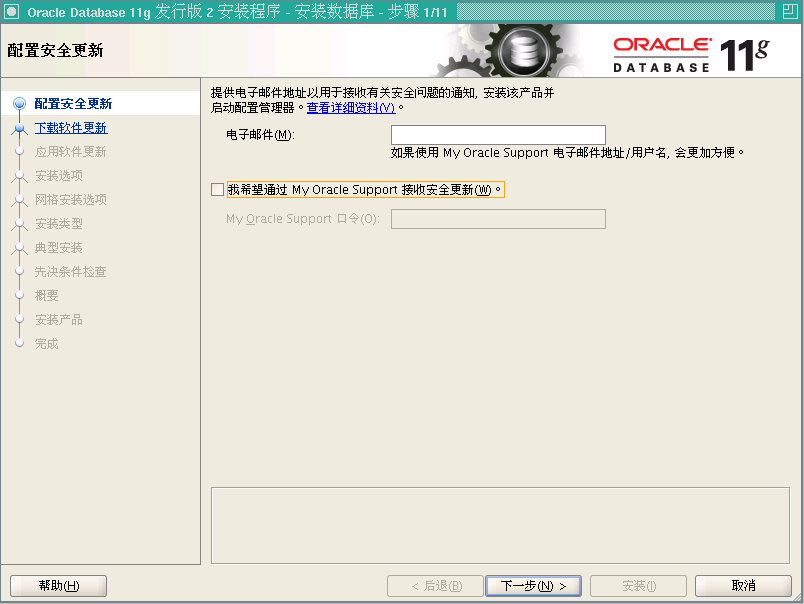
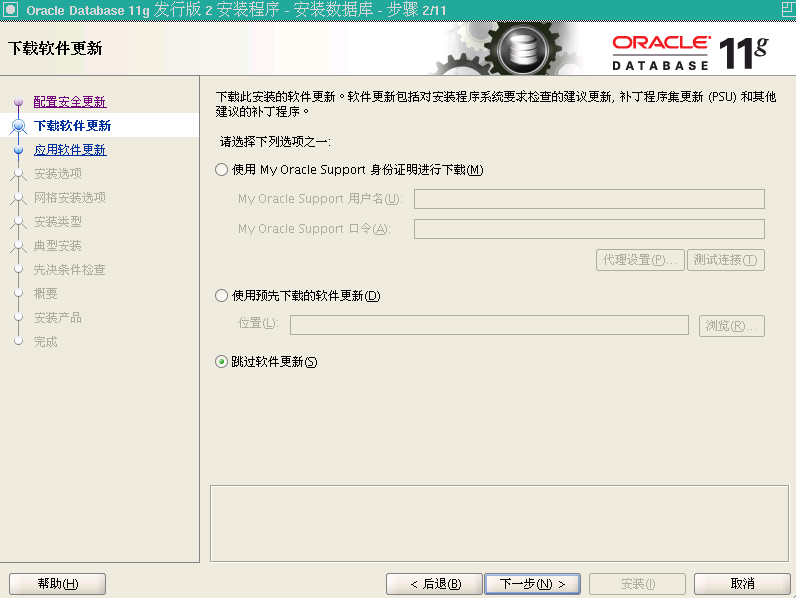
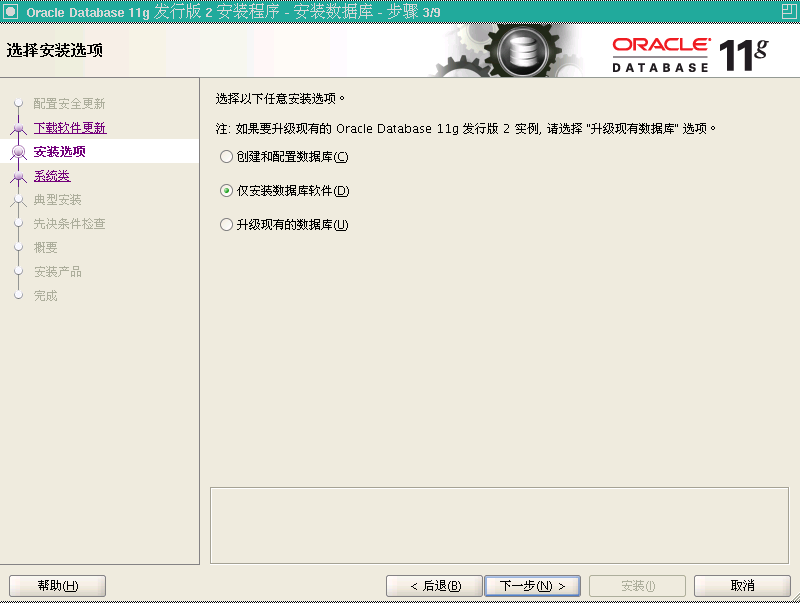
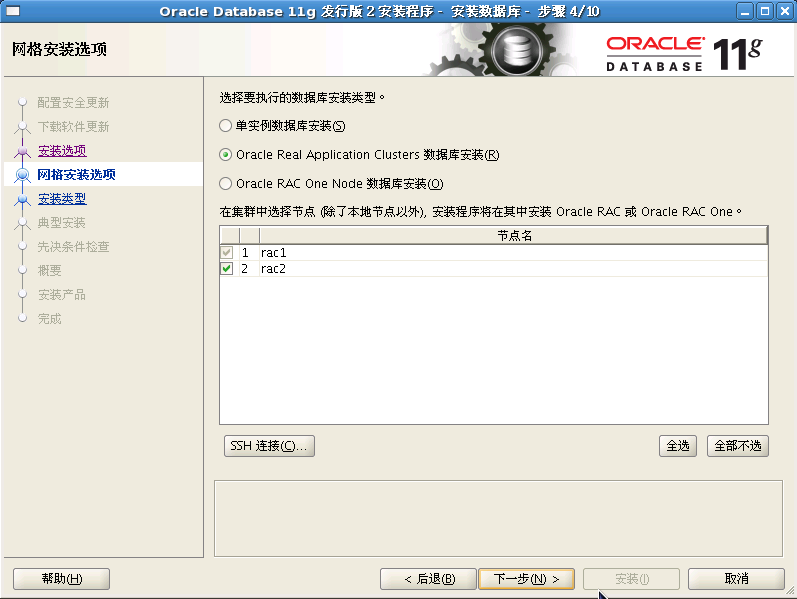
8 . 安装数据库软件
[oracle@rac1 ~]$ cd /112db/database/
[oracle@rac1 database]$ ./runInstaller
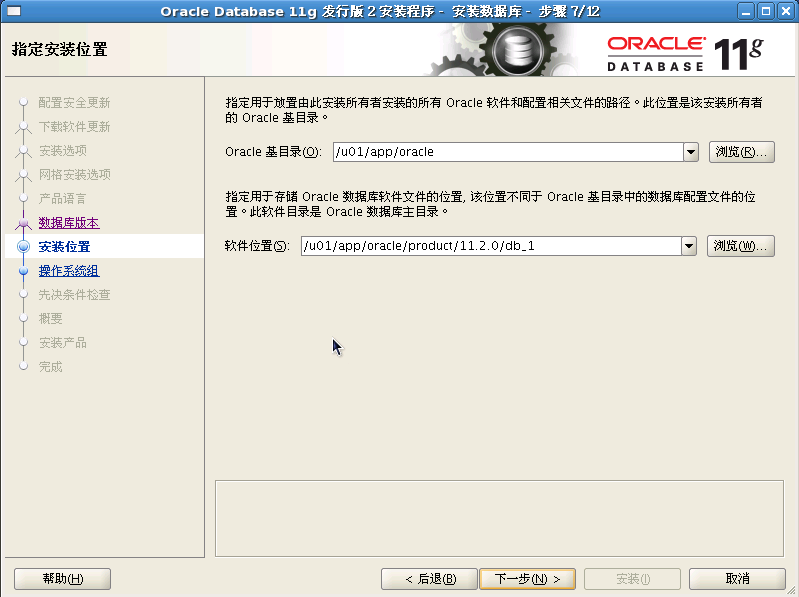


[root@rac1 ~]# cd /u01/app/oracle/product/11.2.0/db_1/
[root@rac1 db_1]# ./root.sh
Performing root user operation for Oracle 11g
The following environment variables are set as:
ORACLE_OWNER= oracle
ORACLE_HOME= /u01/app/oracle/product/11.2.0/db_1
Enter the full pathname of the local bin directory: [/usr/local/bin]:
The contents of "dbhome" have not changed. No need to overwrite.
The contents of "oraenv" have not changed. No need to overwrite.
The contents of "coraenv" have not changed. No need to overwrite.
Entries will be added to the /etc/oratab file as needed by
Database Configuration Assistant when a database is created
Finished running generic part of root script.
Now product-specific root actions will be performed.
Finished product-specific root actions.
[root@rac2 db_1]# ./root.sh
Performing root user operation for Oracle 11g
The following environment variables are set as:
ORACLE_OWNER= oracle
ORACLE_HOME= /u01/app/oracle/product/11.2.0/db_1
Enter the full pathname of the local bin directory: [/usr/local/bin]:
The contents of "dbhome" have not changed. No need to overwrite.
The contents of "oraenv" have not changed. No need to overwrite.
The contents of "coraenv" have not changed. No need to overwrite.
Entries will be added to the /etc/oratab file as needed by
Database Configuration Assistant when a database is created
Finished running generic part of root script.
Now product-specific root actions will be performed.
Finished product-specific root actions.
执行完root.sh脚本,返回界面点确定。
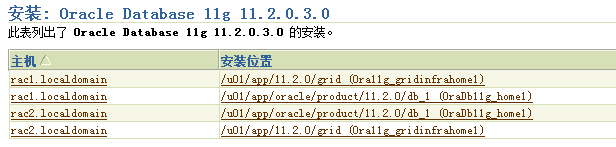
检查安装:
[oracle@rac1 admin]$ lsnrctl status
LSNRCTL for Linux: Version 11.2.0.3.0 - Production on 18-10月-2011 17:24:17
Copyright (c) 1991, 2011, Oracle. All rights reserved.
正在连接到 (ADDRESS=(PROTOCOL=tcp)(HOST=)(PORT=1521))
LISTENER 的 STATUS
------------------------
别名 LISTENER
版本 TNSLSNR for Linux: Version 11.2.0.3.0 - Production
启动日期 18-10月-2011 17:22:35
正常运行时间 0天 0小时 1分 41秒
跟踪级别 off
安全性 ON: Local OS Authentication
SNMP OFF
监听程序参数文件 /u01/app/11.2.0/grid/network/admin/listener.ora
监听程序日志文件 /u01/app/oracle/diag/tnslsnr/rac1/listener/alert/log.xml
监听端点概要...
(DESCRIPTION=(ADDRESS=(PROTOCOL=ipc)(KEY=LISTENER)))
(DESCRIPTION=(ADDRESS=(PROTOCOL=tcp)(HOST=192.168.2.101)(PORT=1521)))
(DESCRIPTION=(ADDRESS=(PROTOCOL=tcp)(HOST=192.168.2.111)(PORT=1521)))
服务摘要..
服务 "+ASM" 包含 1 个实例。
实例 "+ASM1",状态 READY,包含此服务的 1个处理程序...
命令执行成功
[oracle@rac2 ~]$ lsnrctl status
LSNRCTL for Linux: Version 11.2.0.3.0 - Production on 18-10月-2011 17:08:00
Copyright (c) 1991, 2011, Oracle. All rights reserved.
正在连接到 (ADDRESS=(PROTOCOL=tcp)(HOST=)(PORT=1521))
LISTENER 的 STATUS
------------------------
别名 LISTENER
版本 TNSLSNR for Linux: Version 11.2.0.3.0 - Production
启动日期 18-10月-2011 15:21:21
正常运行时间 0天 1小时 46分 39秒
跟踪级别 off
安全性 ON: Local OS Authentication
SNMP OFF
监听程序参数文件 /u01/app/11.2.0/grid/network/admin/listener.ora
监听程序日志文件 /u01/app/oracle/diag/tnslsnr/rac2/listener/alert/log.xml
监听端点概要...
(DESCRIPTION=(ADDRESS=(PROTOCOL=ipc)(KEY=LISTENER)))
(DESCRIPTION=(ADDRESS=(PROTOCOL=tcp)(HOST=192.168.2.102)(PORT=1521)))
(DESCRIPTION=(ADDRESS=(PROTOCOL=tcp)(HOST=192.168.2.112)(PORT=1521)))
服务摘要..
服务 "+ASM" 包含 1 个实例。
实例 "+ASM2",状态 READY,包含此服务的 1个处理程序...
命令执行成功
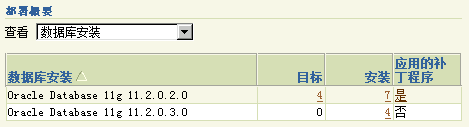
9. 安装agent
Dbca之前先要在grid/bin netca创建好监听,如上面已经建好监听.
Lsnrctl status 可以看到asm注册了,如上面监听状态已经注册了ASM.
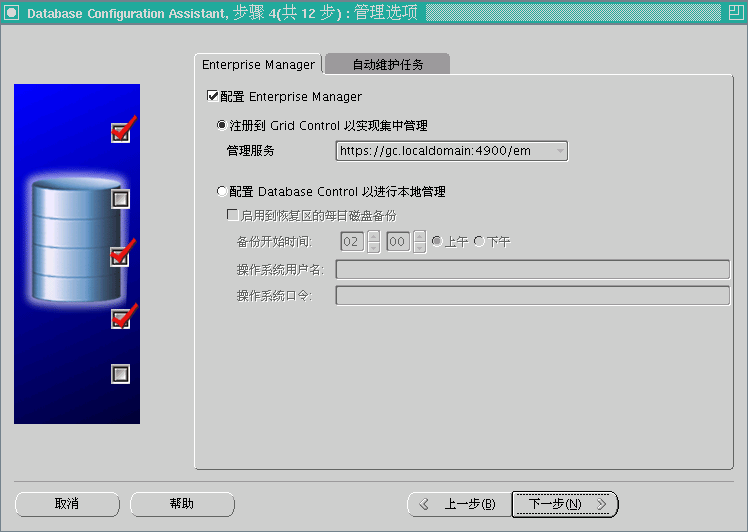
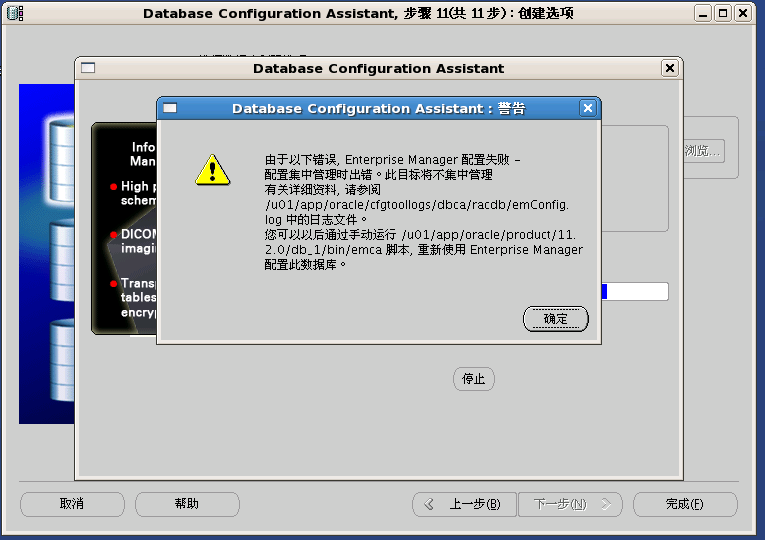
如果这个时候想用GC管理
那么两个节点分别要安装agent
在192.168.2.100(gc)上安装GC(grid control)
在rac1,rac2两节点上安装agent:
RAC 1\2两个节点hosts添加:
192.168.2.100 gc.localdomain gc
GC hosts添加RAC1/2两个节点
192.168.2.101 rac1.localdomain rac1
192.168.2.102 rac2.localdomain rac2
[root@rac1 ~]# chown -R oracle:oinstall /u01/
wget https://gc:4900/agent_download/11.1.0.1.0/linux_x64/agentDownload.linux_x64 --no-check-certificate
chmod u+x agentDownload.linux_x64
./agentDownload.linux_x64 -b /u01/app/ -m gc -r 4900 -y
[root@rac1 ~]# /u01/app//agent11g/root.sh
同样步骤在rac2上安装agent
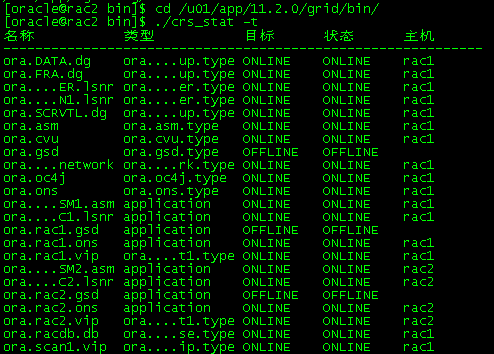
检查安装:
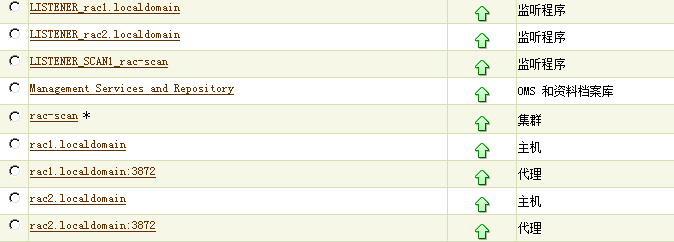

安装成功
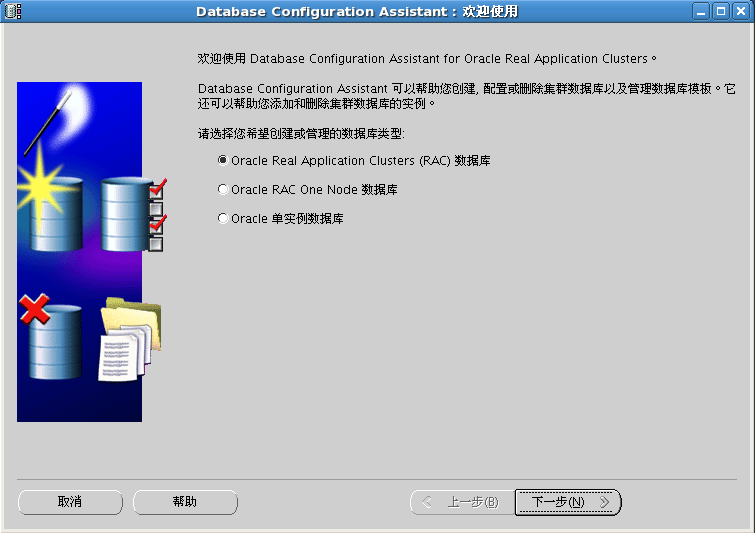
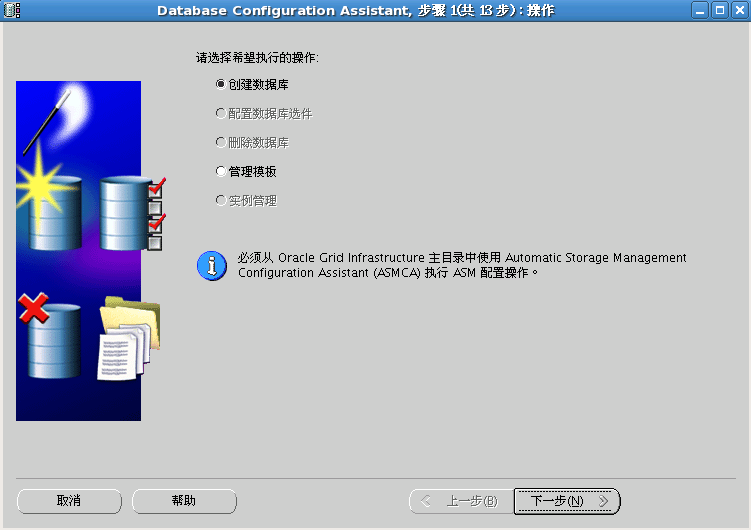
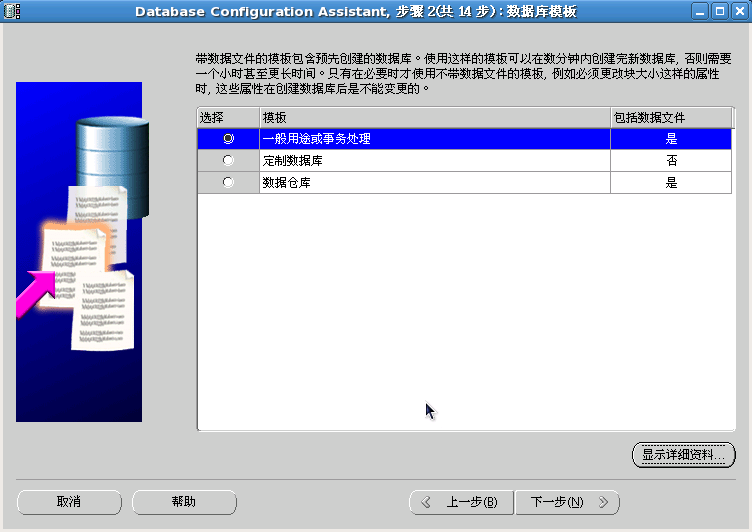
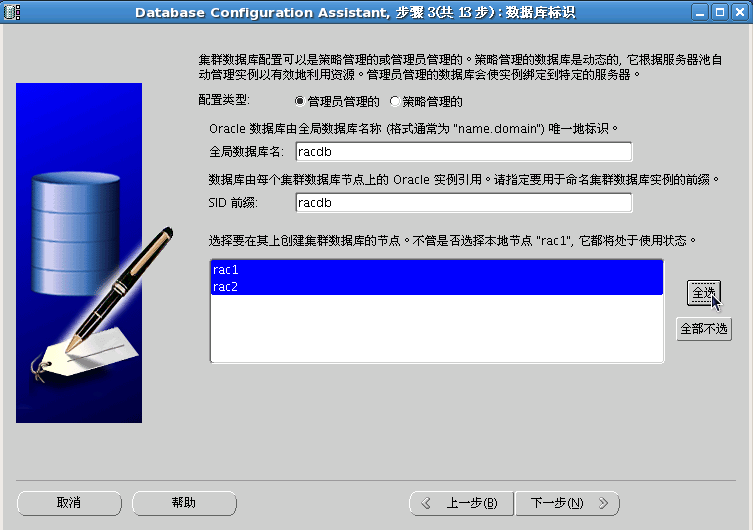
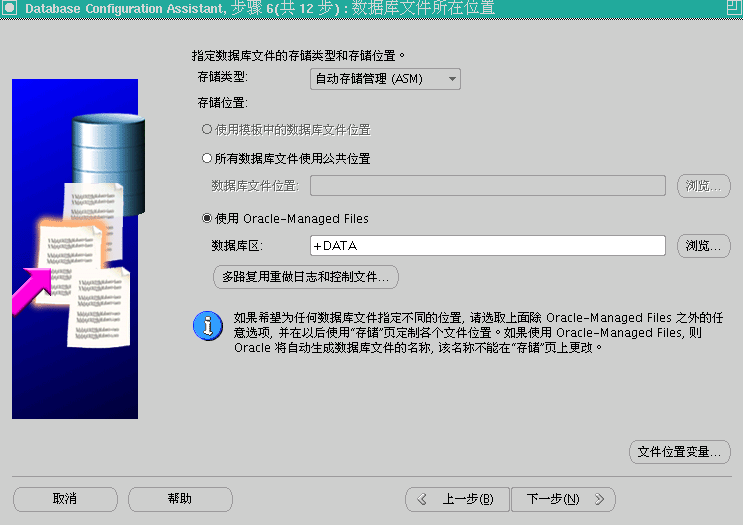
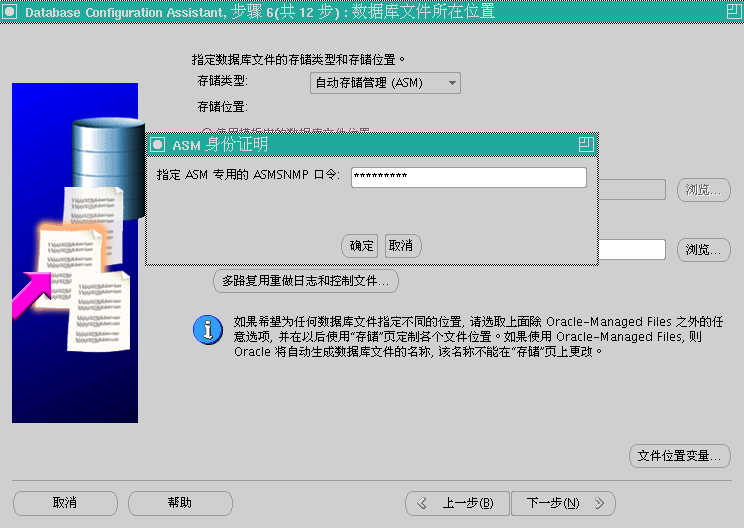
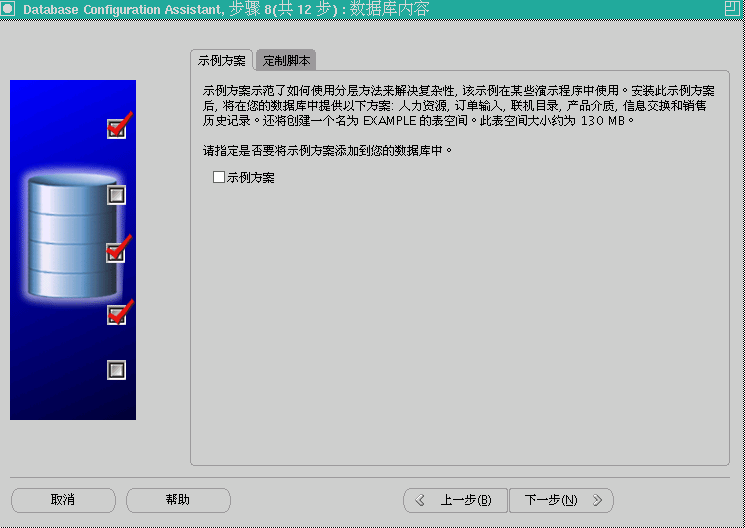
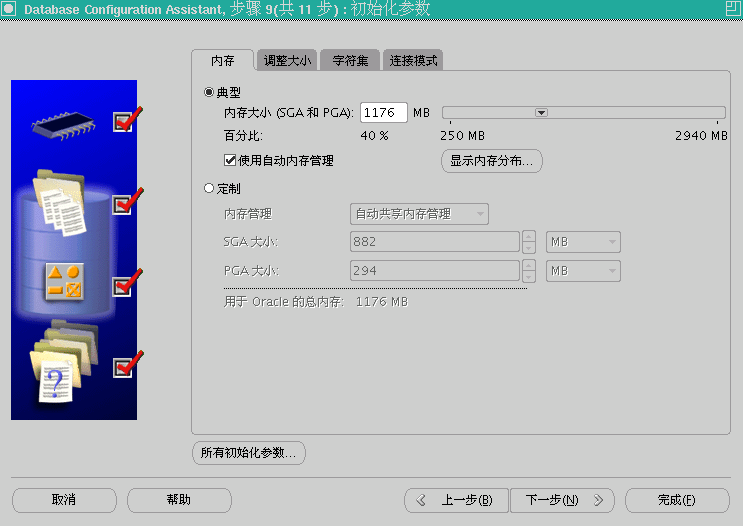
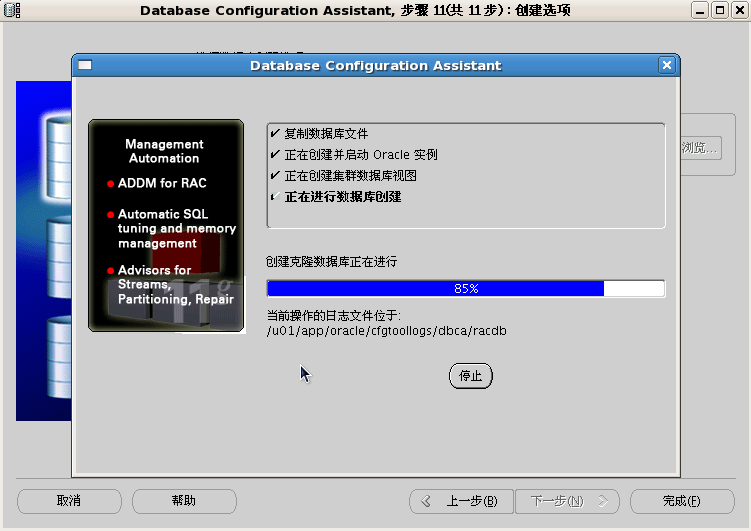
10. 创建数据库
[oracle@rac1 ~]$ dbca
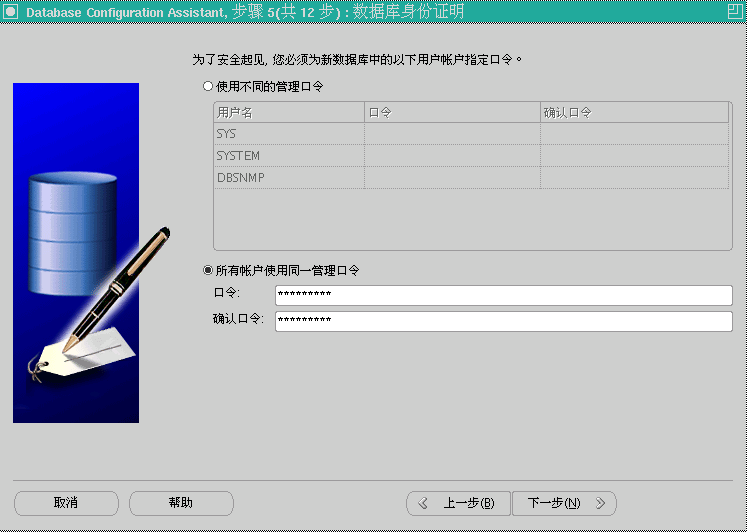
Oracle123
Oracle123
指定快速恢复区:+FRA
启动归档

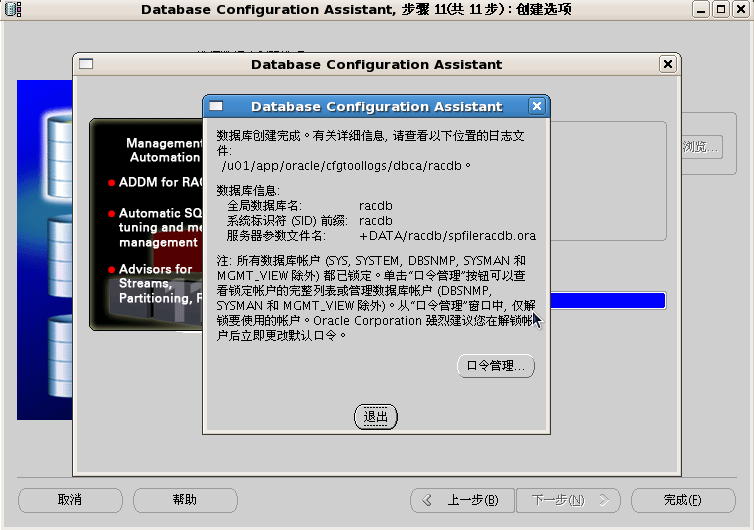
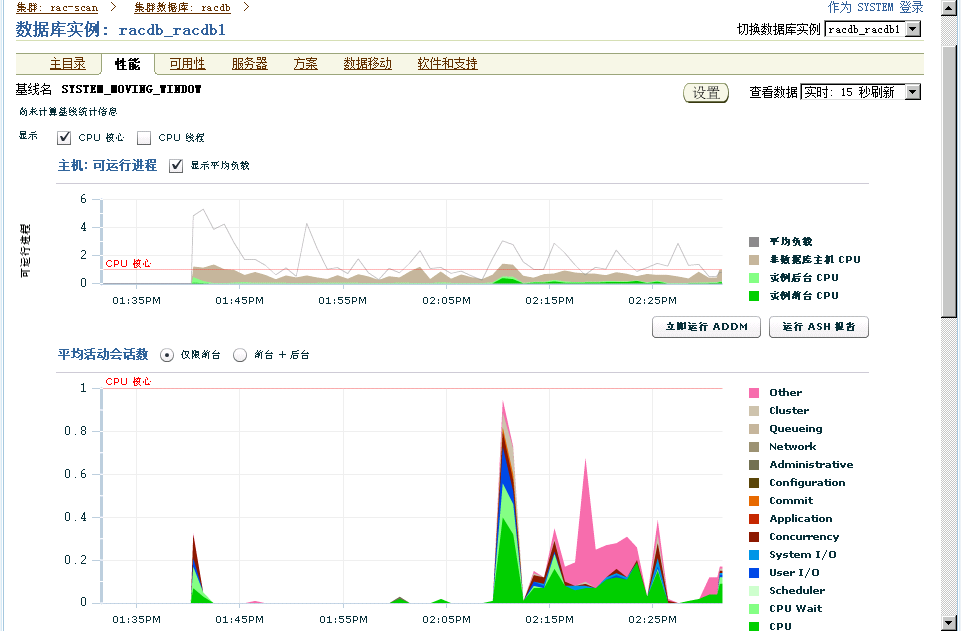
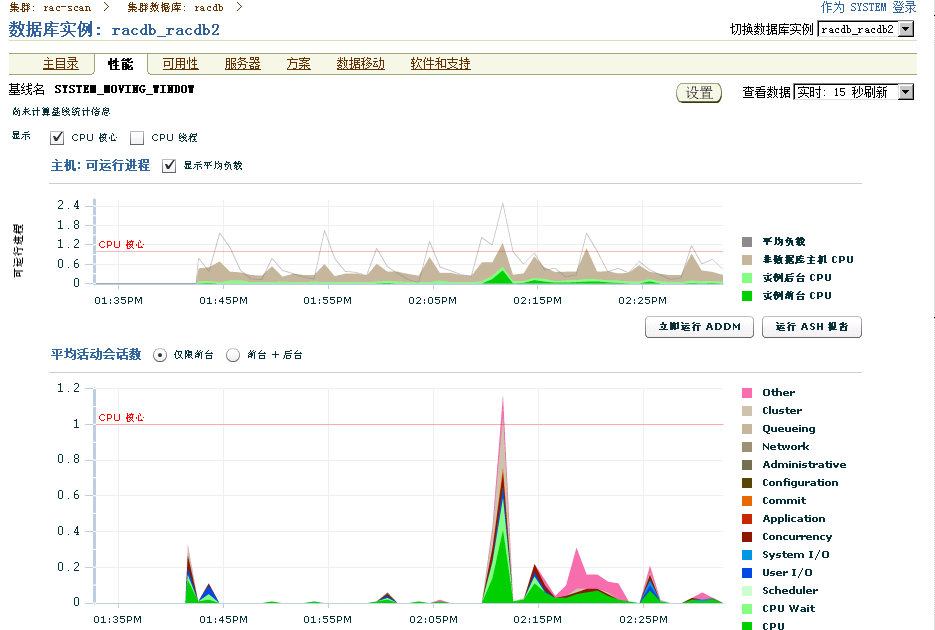
检查安装:


注意:
如果数据库创建后在上面的“目标”位置没有看到目标实例,可以通过下面的方法手动添加实例。如下:

Next:

Next:

Next:
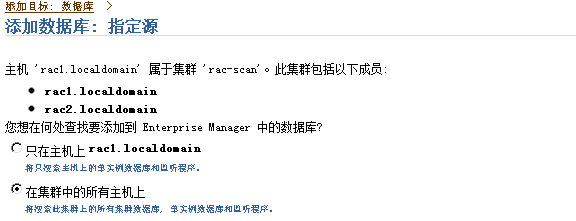
Next:

最后选择要添加的实例,确定。
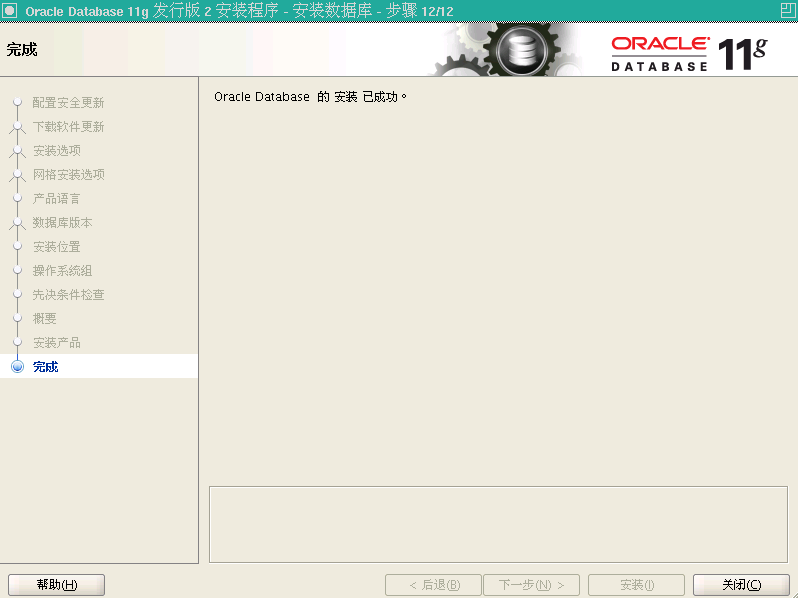
完成配置:
11. 安装过程中遇到问题
问题1:创建数据库时出现ASM磁盘组权限问题
现象:
在创建数据库时,在复制数据文件时,就会出现
ora-19504:failed to create file “+DATA”
……
ora-15055:unable to connect ASM instance
ora-27303:additional information:startup egid=54321(oinstall) ,current egid=54324(dba)
……

解决:
从报错信息可以看出,可能是asm磁盘组权限问题。
Db software安装完成后,$ORACLE_HOME/bin/oracle文件属性如下:
[oracle@rac1 ~]$ cd $ORACLE_HOME/bin/
[oracle@rac1 bin]$ chown oracle:oinstall oracle
[oracle@rac1 bin]$ ls -l oracle
-rwxr-x--x 1 oracle oinstall 232399431 10-20 14:13 oracle
在出现上面创建库报错信息后,再查看此文件
[oracle@rac2 dev]$ cd $ORACLE_HOME/bin
[oracle@rac1 bin]$ ls -l oracle
-rwxr-s--x 1 oracle dba 232399431 10-20 14:13 oracle
这样发现在dbca的过程中$ORACLE_HOME/bin/oracle文件属性会自动被修改,可能就是因为这个原因,导致在属性修改后对ASM组没有了足够的权限创建数据文件。
然后再回顾前面GI的安装过程,在选择OSASM组时选择的dba属组,应该是这里asm属组配置的问题。如下:
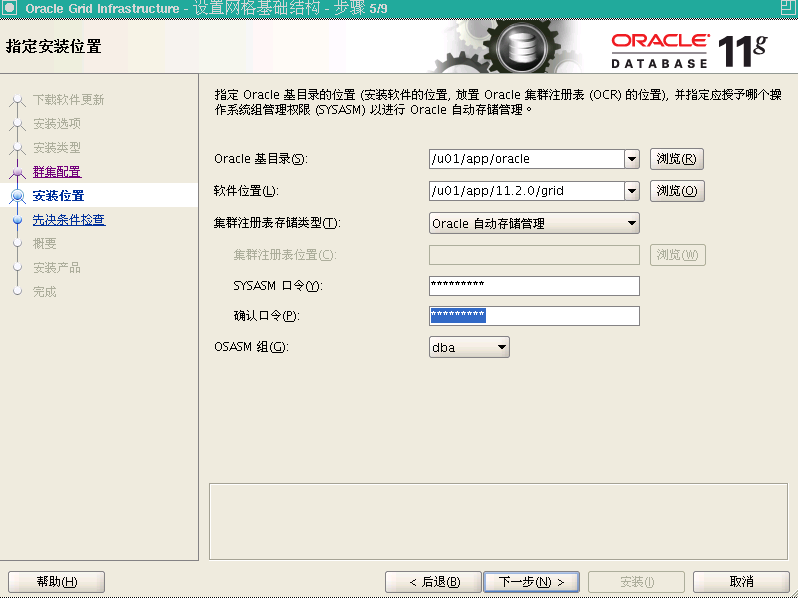
分析了问题原因后,重新部署安装GI,在OSASM组选择oinstall安装,如下:
配置安装完成后,在创建数据库时不会再报错。
再查看$ORACLE_HOME/bin/oracle文件属性
[oracle@rac2 dev]$ cd $ORACLE_HOME/bin
-rwxr-s--x 1 oracle oinstall 232399431 10-20 14:13 oracle
参考1:
Matalink文档:ID 453959.1
Applies to:
Oracle Server - Enterprise Edition - Version: 10.2.0.3 to 10.2.0.5 - Release: 10.2 to 10.2
Information in this document applies to any platform.
***Checked for relevance on 25-Jul-2010***
Symptoms
Connect "/as sysdba" is showing connected but failing when performing any query.
$ sqlplus "/as sysdba"
SQL*Plus: Release 10.2.0.3.0 - Production on Wed Aug 8 19:34:19 2007
Copyright (c) 1982, 2006, Oracle. All Rights Reserved.
Connected.
SQL> select * from v$instance;
select * from v$instance
*
ERROR at line 1:
ORA-01012: not logged on
Changes
gid of the $ORACLE_HOME/bin/oracle was changed when the database was running.
Cause
At the time of startup the background processes are having a gid, and since the gid of the
$ORACLE_HOME/bin/oracle was changed, the new gid was not matching with the gid at startup.
Below entries can be found in the trace file, ORA-27303 indicates the startup and current gid.
Oracle Database 10g Enterprise Edition Release 10.2.0.3.0 - 64bit Production
With the Partitioning, OLAP and Data Mining options
ORACLE_HOME = /opt/oracle/product/10.2.0.3
System name: AIX
Node name: oracleprd1
Release: 3
Version: 5
Machine: 00CA784D4C00
Instance name: ORCL
Redo thread mounted by this instance: 1
Oracle process number: 0
Unix process pid: 524430, image: oracle@oracleprd1
Died during process startup with error 27140 (seq=805)
OPIRIP: Uncaught error 27140. Error stack:
ORA-27140: attach to post/wait facility failed
ORA-27300: OS system dependent operation:invalid_egid failed with status: 1
ORA-27301: OS failure message: Not owner
ORA-27302: failure occurred at: skgpwinit6
ORA-27303: additional information: startup egid = 202 (?), current egid = 101 (dba)
oracle@ectrdbp0: BELKPRD : /opt/oracle/BELKPRD/bdump
Solution
Change the gid of the $ORACLE_HOME/bin/oracle to the original value i.e. startup gid.
http://yangtingkun.itpub.net/post/468/523429
参考2:
Matalink文档:ID 1054033.1
ORA-15183 Unable to Create Database on Server using 11.2 ASM and Grid Infrastructure [ID 1054033.1]
Applies to:
Oracle Server - Enterprise Edition - Version: 10.2.0.1 to 11.2.0.1.0 - Release: 10.2 to 11.2
Information in this document applies to any platform.
Symptoms
Using 11.2.0.1 Grid Infrastructure and ASM, try to create pre-11.2 database as RDBMS software owner "oradb", while Grid is installed as grid user "oragrid", getting error in "create database ..." command:
For 11.1.0.x database, the error is like:
ERROR: asm_version error. err: driver/agent not installed rc:2
ORA-15183: ASMLIB initialization error [driver/agent not installed]
WARNING:FAILED to load library: /opt/oracle/extapi/64/asm/orcl/1/libasm.so
ERROR: asm_init(): asm_erc:-5 msg:Driver not installed pid:25261
For 10.2.0.x database, the error is like:
Foreground process get:ORA-03113: end-of-file on communication channelIn alert log:----------Fri May 20 11:02:10 2011Errors in file /u01/app/oradb2/oracle/product/10.2.0/db_1/rdbms/log/rac1_rbal_8541.trc:ORA-15183: ASMLIB initialization error [driver/agent not installed]Fri May 20 11:02:10 2011Errors in file /u01/app/oradb2/oracle/product/10.2.0/db_1/rdbms/log/rac1_rbal_8541.trc:ORA-15183: ASMLIB initialization error [/opt/oracle/extapi/32/asm/orcl/1/libasm.so]ORA-15183: ASMLIB initialization error [driver/agent not installed]Fri May 20 11:02:10 2011Errors in file /u01/app/oradb2/oracle/product/10.2.0/db_1/rdbms/log/rac1_psp0_8496.trc:ORA-00600: internal error code, arguments: [kfkLoadByNum03], [0x20006618], [], [], [], [], [], []
Or if the database is created in earlier release, after upgrade to 11.2 Grid Infrastructure and ASM, user orasup in dba group (not the RDBMS software owner) can not query v$database:
[orasup@node2]sqlplus / as sysdbaSQL> select * from v$database;ORA-03113: end-of-file on communication channelalert log shows error: ORA-600[kfk_load_by_idx_in_pga9]
The grid, oracle and orasup users are defined as:
[oragrid@node2]$ id oragriduid=212(oragrid) gid=201(oinstall) groups=201(oinstall),202(dba),204(asmadmin),205(asmdba),220(asmoper)[oradb@node2]$ id oradbuid=215(oradb) gid=201(oinstall) groups=201(oinstall),202(dba),205(asmdba),222(oper)[orasup@node2] $ id orasupuid=217{orasup) gid=202(dba)groups=202(dba),205(asmdba),222(oper)
Cause
This is caused by the use of job role separation and oracle binary not having the proper group ownership preventing the database software owner "oradb" from accessing the ASMlib driver or ASM disks.
During 11.2 Gird Infrastructure installation, it prompts to select ASM admin group and ASM dba group. Assume asmadmin is used for ASM admin group and asmdba is used for ASM dba group.
Only users that are members of the asmadmin group have direct access to ASM disks and maintenance. For other database users (software owners or dba group users), the access is gained via the oracle executable ($ORACLE_HOME/bin/oracle). It should have a setgid bit with group set to "asmadmin".
The 11.2 "oracle" binary is changed automatically via setasmgidwrap when the instance is started by the CRS daemon (e.g. srvctl start database/instance). But for earlier release, the "oracle" binary group and ownership need to be set manually.
In this case, the oracle binary is owned by
-rwsr-s--x 1 oracle oinstall
instead of
-rwsr-s--x 1 oracle asmadmin
For Linux platform, one can verify via "/usr/sbin/oracleasm configure" to confirm the ASM admin group group setting:
ORACLEASM_UID=gridORACLEASM_GID=asmadmin
For other platform, check installAction<date>.log for OSASM setting.
Solution
1. Manually change the oracle binary ownership and permission:
as root user:# cd $ORACLE_HOME/bin# chgrp asmadmin oracle# chmod 6751 oracle# ls -l oracle
Ensure the ownership and permission is now like:
-rwsr-s--x 1 oradb asmadmin
2. Restart the instance
3. Retry "create database" command or retry the query as dba group user.
* Note 1: This change is only required for RDBMS $ORACLE_HOME/bin/oracle. Please do not modify $GRID_HOME/bin/oracle binary ownership.
* Note 2: Anytime when a patch is applied to the database ORACLE_HOME, please ensure above ownership and permission is corrected after the patch.
参考文章:
http://www.oracle-base.com/articles/11g/oracle-db-11gr1-rac-installation-on-ol5-using-vmware-server-2.php