Solaris 10 的安装【转载】
Solaris 10 的安装-----------------------------》转载留着以后复习
我的镜像文件,虚拟机版本为VMware 7.1.4,记得内存设大点,不然cpu panic
下载地址:http://download.oracle.com/auth/otn/solaris/10/sol-10-u10-ga2-x86-dvd.iso?e=1318698789&h=3eb544c46cec0ae8c67eb99f6e4ce92a
![clip_image004[7] Solaris 十 的安装【转载】](http://img.reader8.net/uploadfile/jiaocheng/20140169/2851/2014012816513819472.jpg)
新建虚拟机
![clip_image006[6] Solaris 十 的安装【转载】](http://img.reader8.net/uploadfile/jiaocheng/20140169/2851/2014012816513819473.jpg)
, 下一步
![clip_image008[6] Solaris 十 的安装【转载】](http://img.reader8.net/uploadfile/jiaocheng/20140169/2851/2014012816513819474.jpg)
VMware 版本
![clip_image010[6] Solaris 十 的安装【转载】](http://img.reader8.net/uploadfile/jiaocheng/20140169/2851/2014012816513819475.jpg)
选择使用物理光驱 或是镜像文件 下一步
![clip_image012[6] Solaris 十 的安装【转载】](http://img.reader8.net/uploadfile/jiaocheng/20140169/2851/2014012816513819476.jpg)
设置计算机名 和 安装位置
![clip_image014[6] Solaris 十 的安装【转载】](http://img.reader8.net/uploadfile/jiaocheng/20140169/2851/2014012816513819477.jpg)
处理器个数
![clip_image016[6] Solaris 十 的安装【转载】](http://img.reader8.net/uploadfile/jiaocheng/20140169/2851/2014012816513819478.jpg)
设置内存大小
![clip_image018[6] Solaris 十 的安装【转载】](http://img.reader8.net/uploadfile/jiaocheng/20140169/2851/2014012816513819479.jpg)
选择网卡的类型
![clip_image020[6] Solaris 十 的安装【转载】](http://img.reader8.net/uploadfile/jiaocheng/20140169/2851/2014012816513819480.jpg)
适配器类型
![clip_image022[6] Solaris 十 的安装【转载】](http://img.reader8.net/uploadfile/jiaocheng/20140169/2851/2014012816513819481.jpg)
创建一个新的硬盘
![clip_image024[6] Solaris 十 的安装【转载】](http://img.reader8.net/uploadfile/jiaocheng/20140169/2851/2014012816513819482.jpg)
硬盘类型,
![clip_image026[6] Solaris 十 的安装【转载】](http://img.reader8.net/uploadfile/jiaocheng/20140169/2851/2014012816513819483.jpg)
硬盘大小
![clip_image028[6] Solaris 十 的安装【转载】](http://img.reader8.net/uploadfile/jiaocheng/20140169/2851/2014012816513819484.jpg)
硬盘名称
![clip_image030[6] Solaris 十 的安装【转载】](http://img.reader8.net/uploadfile/jiaocheng/20140169/2851/2014012816513819485.jpg)
确认无误后 完成
![clip_image032[6] Solaris 十 的安装【转载】](http://img.reader8.net/uploadfile/jiaocheng/20140169/2851/2014012816513819486.jpg)
第一个 即可 若没有选择的话默认时间后系统会自动地选择的
![clip_image034[6] Solaris 十 的安装【转载】](http://img.reader8.net/uploadfile/jiaocheng/20140169/2851/2014012816513819487.jpg)
选择安装类型 若没有选择的话 会有默认选项的
![clip_image036[6] Solaris 十 的安装【转载】](http://img.reader8.net/uploadfile/jiaocheng/20140169/2851/2014012816513819488.jpg)
![clip_image038[6] Solaris 十 的安装【转载】](http://img.reader8.net/uploadfile/jiaocheng/20140169/2851/2014012816513819489.jpg)
选择 英文 按F2确认
![clip_image040[6] Solaris 十 的安装【转载】](http://img.reader8.net/uploadfile/jiaocheng/20140169/2851/2014012816513819490.jpg)
回车即可
![clip_image042[6] Solaris 十 的安装【转载】](http://img.reader8.net/uploadfile/jiaocheng/20140169/2851/2014012816513819491.jpg)
区域内 点击鼠标
![clip_image044[6] Solaris 十 的安装【转载】](http://img.reader8.net/uploadfile/jiaocheng/20140169/2851/2014012816513819492.jpg)
选择 6 简体中文
![clip_image046[6] Solaris 十 的安装【转载】](http://img.reader8.net/uploadfile/jiaocheng/20140169/2851/2014012816513819493.jpg)
![clip_image048[6] Solaris 十 的安装【转载】](http://img.reader8.net/uploadfile/jiaocheng/20140169/2851/2014012816513819494.jpg) 下一步
下一步
![clip_image050[6] Solaris 十 的安装【转载】](http://img.reader8.net/uploadfile/jiaocheng/20140169/2851/2014012816513819495.jpg)
联网的
![clip_image052[6] Solaris 十 的安装【转载】](http://img.reader8.net/uploadfile/jiaocheng/20140169/2851/2014012816513819496.jpg) 暂时不使用 DHCP
暂时不使用 DHCP
![clip_image054[6] Solaris 十 的安装【转载】](http://img.reader8.net/uploadfile/jiaocheng/20140169/2851/2014012816513819497.jpg)
起个主机名
![clip_image056[6] Solaris 十 的安装【转载】](http://img.reader8.net/uploadfile/jiaocheng/20140169/2851/2014012816513819498.jpg)
手动填写 ip地址 ,这里注意 小键盘的.是不好用的
![clip_image058[6] Solaris 十 的安装【转载】](http://img.reader8.net/uploadfile/jiaocheng/20140169/2851/2014012816513819499.jpg)
确认子网掩码
![clip_image060[6] Solaris 十 的安装【转载】](http://img.reader8.net/uploadfile/jiaocheng/20140169/2851/2014012816513819500.jpg) 暂不启用 ipv6
暂不启用 ipv6
![clip_image062[6] Solaris 十 的安装【转载】](http://img.reader8.net/uploadfile/jiaocheng/20140169/2851/2014012816513819501.jpg)
现在的路由 指不指定 都没关系
![clip_image064[6] Solaris 十 的安装【转载】](http://img.reader8.net/uploadfile/jiaocheng/20140169/2851/2014012816513819502.jpg)
不启用这个
![clip_image066[6] Solaris 十 的安装【转载】](http://img.reader8.net/uploadfile/jiaocheng/20140169/2851/2014012816513819503.jpg)
暂时不具备解析能力 故选择无
![clip_image068[6] Solaris 十 的安装【转载】](http://img.reader8.net/uploadfile/jiaocheng/20140169/2851/2014012816513819504.jpg) 派生的吧
派生的吧
![clip_image070[6] Solaris 十 的安装【转载】](http://img.reader8.net/uploadfile/jiaocheng/20140169/2851/2014012816513819505.jpg)
选择地区
![clip_image072[6] Solaris 十 的安装【转载】](http://img.reader8.net/uploadfile/jiaocheng/20140169/2851/2014012816513819506.jpg)
选择国家和大洲
![clip_image074[6] Solaris 十 的安装【转载】](http://img.reader8.net/uploadfile/jiaocheng/20140169/2851/2014012816513819507.jpg)
选择亚洲下的中国
![clip_image076[6] Solaris 十 的安装【转载】](http://img.reader8.net/uploadfile/jiaocheng/20140169/2851/2014012816513819508.jpg)
![clip_image078[6] Solaris 十 的安装【转载】](http://img.reader8.net/uploadfile/jiaocheng/20140169/2851/2014012816513819509.jpg)
确认时间
![clip_image080[6] Solaris 十 的安装【转载】](http://img.reader8.net/uploadfile/jiaocheng/20140169/2851/2014012816513819510.jpg)
注意密码的一致性,注意这里的tab键是不可以用的
![clip_image082[6] Solaris 十 的安装【转载】](http://img.reader8.net/uploadfile/jiaocheng/20140169/2851/2014012816513819511.jpg)
确认无误 开始安装
![clip_image084[6] Solaris 十 的安装【转载】](http://img.reader8.net/uploadfile/jiaocheng/20140169/2851/2014012816513819512.jpg)
![clip_image086[6] Solaris 十 的安装【转载】](http://img.reader8.net/uploadfile/jiaocheng/20140169/2851/2014012816513819513.jpg)
接受吧,没有是很正常的 ,我的网络中暂时没有路由
![clip_image088[6] Solaris 十 的安装【转载】](http://img.reader8.net/uploadfile/jiaocheng/20140169/2851/2014012816513819514.jpg)
![clip_image090[6] Solaris 十 的安装【转载】](http://img.reader8.net/uploadfile/jiaocheng/20140169/2851/2014012816513819515.jpg)
下一步
![clip_image092[6] Solaris 十 的安装【转载】](http://img.reader8.net/uploadfile/jiaocheng/20140169/2851/2014012816513819516.jpg)
![clip_image094[6] Solaris 十 的安装【转载】](http://img.reader8.net/uploadfile/jiaocheng/20140169/2851/2014012816513819517.jpg)
![clip_image096[6] Solaris 十 的安装【转载】](http://img.reader8.net/uploadfile/jiaocheng/20140169/2851/2014012816513819518.jpg)
默认选项 下一步
![clip_image098[6] Solaris 十 的安装【转载】](http://img.reader8.net/uploadfile/jiaocheng/20140169/2851/2014012816513819519.jpg)
![clip_image100[6] Solaris 十 的安装【转载】](http://img.reader8.net/uploadfile/jiaocheng/20140169/2851/2014012816513819520.jpg)
同意许可协议 下一步
![clip_image102[6] Solaris 十 的安装【转载】](http://img.reader8.net/uploadfile/jiaocheng/20140169/2851/2014012816513819521.jpg)
这里选择自定义安装
![clip_image104[6] Solaris 十 的安装【转载】](http://img.reader8.net/uploadfile/jiaocheng/20140169/2851/2014012816513819522.jpg)
这个就是选择自定义安装的原因
![clip_image106[6] Solaris 十 的安装【转载】](http://img.reader8.net/uploadfile/jiaocheng/20140169/2851/2014012816513819523.jpg)
下一步
![clip_image108[6] Solaris 十 的安装【转载】](http://img.reader8.net/uploadfile/jiaocheng/20140169/2851/2014012816513819524.jpg)
这里的中文都是默认选好的 下一步即可
![clip_image110[6] Solaris 十 的安装【转载】](http://img.reader8.net/uploadfile/jiaocheng/20140169/2851/2014012816513819525.jpg)
下一步
![clip_image112[6] Solaris 十 的安装【转载】](http://img.reader8.net/uploadfile/jiaocheng/20140169/2851/2014012816513819526.jpg)
我们做一个完全安装 下一步
![clip_image114[6] Solaris 十 的安装【转载】](http://img.reader8.net/uploadfile/jiaocheng/20140169/2851/2014012816513819527.jpg)
下一步
![clip_image116[6] Solaris 十 的安装【转载】](http://img.reader8.net/uploadfile/jiaocheng/20140169/2851/2014012816513819528.jpg)
![clip_image118[6] Solaris 十 的安装【转载】](http://img.reader8.net/uploadfile/jiaocheng/20140169/2851/2014012816513819529.jpg)
![clip_image120[6] Solaris 十 的安装【转载】](http://img.reader8.net/uploadfile/jiaocheng/20140169/2851/2014012816513819530.jpg)
确认分区情况
![clip_image122[6] Solaris 十 的安装【转载】](http://img.reader8.net/uploadfile/jiaocheng/20140169/2851/2014012816513819531.jpg)
立即安装
![clip_image124[6] Solaris 十 的安装【转载】](http://img.reader8.net/uploadfile/jiaocheng/20140169/2851/2014012816513819532.jpg)
![clip_image126[6] Solaris 十 的安装【转载】](http://img.reader8.net/uploadfile/jiaocheng/20140169/2851/2014012816513819533.jpg)
安装过程 我的环境下不到20分钟吧 配置不同的话可能会长一点
![clip_image128[6] Solaris 十 的安装【转载】](http://img.reader8.net/uploadfile/jiaocheng/20140169/2851/2014012816513819534.jpg)
系统提示要暂停90秒 。暂停一下吧
![clip_image130[6] Solaris 十 的安装【转载】](http://img.reader8.net/uploadfile/jiaocheng/20140169/2851/2014012816513819535.jpg)
![clip_image132[6] Solaris 十 的安装【转载】](http://img.reader8.net/uploadfile/jiaocheng/20140169/2851/2014012816513819536.jpg)
相同的情形 , 停就停吧
![clip_image134[6] Solaris 十 的安装【转载】](http://img.reader8.net/uploadfile/jiaocheng/20140169/2851/2014012816513819537.jpg)
![clip_image136[6] Solaris 十 的安装【转载】](http://img.reader8.net/uploadfile/jiaocheng/20140169/2851/2014012816513819538.jpg)
![clip_image138[6] Solaris 十 的安装【转载】](http://img.reader8.net/uploadfile/jiaocheng/20140169/2851/2014012816513819539.jpg)
重新引导程序
![clip_image140[6] Solaris 十 的安装【转载】](http://img.reader8.net/uploadfile/jiaocheng/20140169/2851/2014012816513819540.jpg)
![clip_image142[6] Solaris 十 的安装【转载】](http://img.reader8.net/uploadfile/jiaocheng/20140169/2851/2014012816513819541.jpg)
![clip_image144[6] Solaris 十 的安装【转载】](http://img.reader8.net/uploadfile/jiaocheng/20140169/2851/2014012816513819542.jpg)
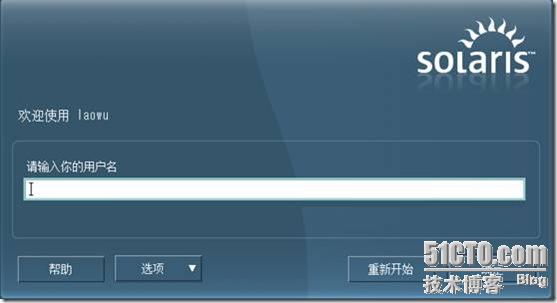
用户名 root
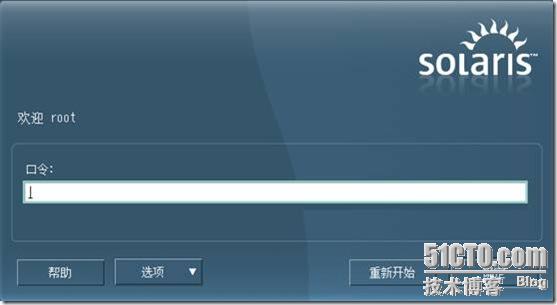
输入你设定的密码
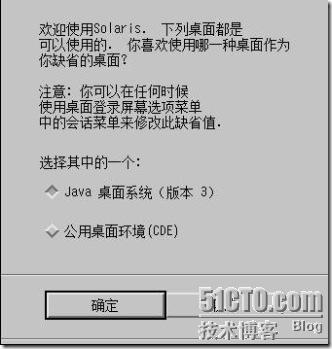
默认的Java 桌面环境和windows很相似容易上手 ,和linux的桌面也有相同之处 ,个人觉得要好一点 , 不建议选择公用桌面环境 ,如果你不是很习惯它的话
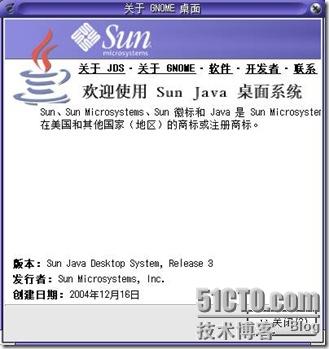
类似于一个介绍 ,通常我都会随手关掉 ,这个可以读一下
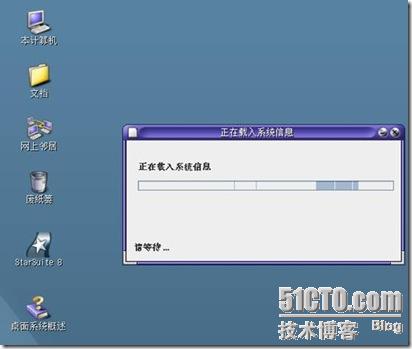
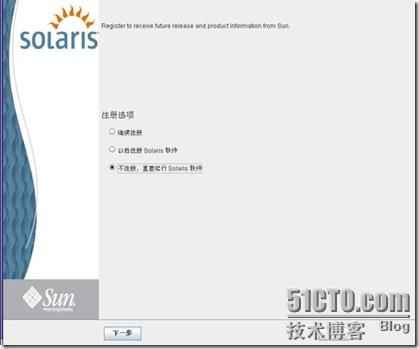

选择用户注册 ,这个根据个人的使用需求决定
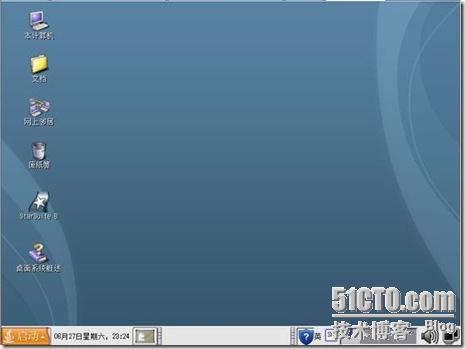
光看桌面上的东西你会觉得和windows 差别很小。应该会很容易上手的,任务栏上 有和linux的类似 ,感觉这个桌面做的还是相当不错的
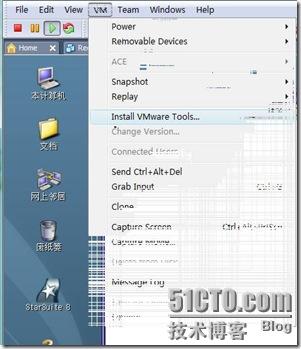
由于安装过程中鼠标点进去是要按住ctrl+alt键才能释放鼠标的 ,根据以往的linux 的使用经验,看看VMware tools 工具能不能装
这里
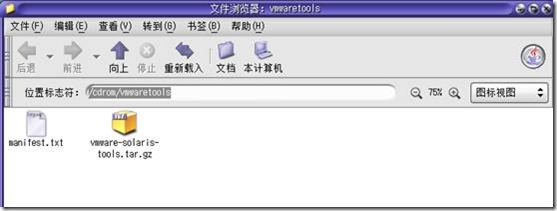
把VMware tools ……… tar.gz 的文件夹拷贝至 /tmp 目录下 这些 用鼠标右击即可 都有选项的,很简单 ,
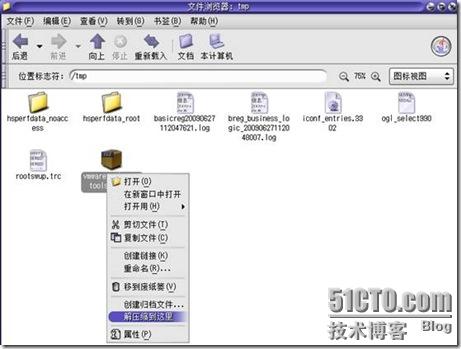
实话说我并不清楚,linux下的解压命令在这里能不能用,所以我打开文件系统,进入tmp文件夹,把VMware tools 的那个压缩文件 复制到这里后 ,右击文件选择解压缩到此处
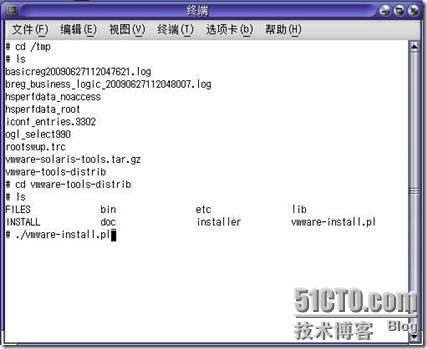
桌面上右击 ,选择打开终端 ,进入/tmp 目录 ,ls 显示一下文件中内容 。进入VMware-tools-distrib的文件夹 ,在ls显示一下 ,接着输入./vmware-install.pl 来安装VMwaretools 工具 ,还有就是貌似这里是没有tab键补全功能的 ,所以请注意你键入的没有错误,
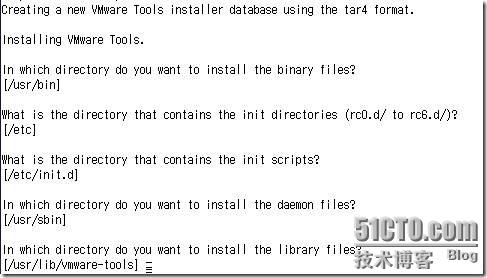
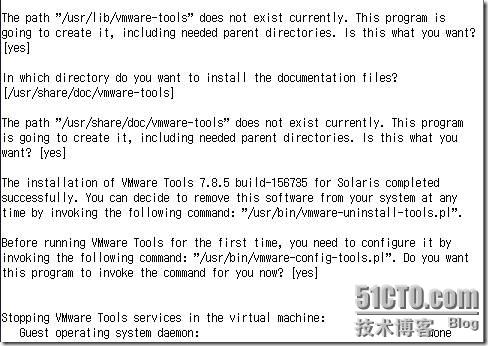
根据 redhat 下tools工具安装的经验 这里一路回车
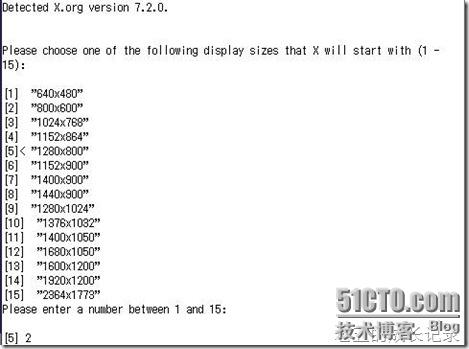
选择屏幕分辨率 如 我这里选择的是800x600
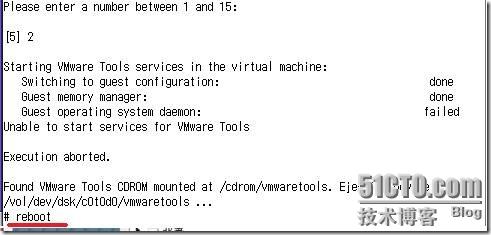
这是我觉得 可以手动卸下光盘镜像了
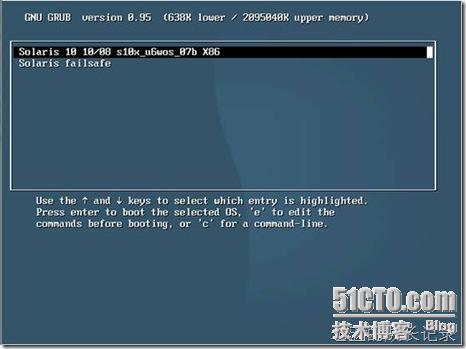
第一个选项 。回车
本文出自 “老五的成长记录” 博客
?